How to manage user’s info?
There are several ways to update a user’s profile. Please read the guideline below completely before making any changes to avoid problems later on. Not sure which option is best according to your technical set-up? Reach out to our Customer Success team at the bottom of this page.
Manual vs automated
You can manage your users directly in Spencer, by uploading all your employee info via spreadsheet into our back office. This solution is perfect when you have a smaller user base or when you have a low turnover and your employee information doesn’t change very often.
We also see this setup being used often in the beginning when the automated import has not yet been set up by your IT team or when you want to perform the first clean up of your HR data.
When you have a high number of employees or a lot of turnover, you can choose to automate user management. This happens via an overnight sync, where most commonly an export is created from your core HR system and imported every night by Spencer through a secure FTP.
We can activate this automated sync at any time, so no worries if you don’t have your automated setup ready instantly.
There is an important difference with the option to sync users with a CSV through SFTP. In the back office, you can upload a CSV that only contains updated users, the SFTP requires all users.
This makes it easier to update certain users in bulk.
If you want to archive users in bulk, the SFTP upload will do it automatically by comparing the new user list with the user list that is already in the back office. All users that are not in the new user list are archived, as we consider them as having left the company.
With a CSV file, it is also possible to archive users in bulk. Just add a column “archived_at” to your CSV file and fill it in for the users you want to archive with a date and time in this format: YYYY-MM-DD hh:mm:ss.
Another possibility to archive a user in the back office, is to do this manually. Just go to an employee’s profile via User Management and click on the button “Archive” at the bottom of the page.
Ensure your data is ready
How to prepare your user data for Spencer?
In order to process your employee information correctly, we have created an Excel template that you can use to organize your HR data.
Not all fields are mandatory! We require
- An External ID (which should be unique for each employee)
- First Name
- Last Name
- Country
- Preferred language
- An email address or mobile phone number
Avoid data errors in your telephone numbers
We see the most issues when it comes to HR data cleanness in telephone numbers.
Spencer requires the formatting +32478123456, so no funky characters.
In case your data for phone numbers is not clean, we recommend to not sync this field, as it will result in a failed import.
A few tips to create the correct format for telephone numbers:
- add a ‘ before the telephone number so Excel won’t think you want to create a formula.
- is the + missing before the telephone number? The CONCATENATE formula can help you to add it automatically. The video below explains how to use this formula.
Pay attention to which data you import
You can use the fields private_mobile_phone & private_email to hide these fields.
This can be useful when you have deskless workers who don’t have a company email address or phone number.
As we require a phone number or email address to authenticate them once when they log in for the very first time.
We require this info to ensure that not everyone can just get access to your employee app information.
Birthday is often a field that is sensitive for employees, so we don’t recommend adding this to the profile

The most important field: the external ID
but is a, in thePeople can change names, email addresses and departments.
It is crucial for Spencer to know which user is who when we receive new data from you.
That’s why we have an external ID. This is the unique connection between our existing data and your newly arriving data.
If you work with an automatic user sync: make sure to choose an external ID that always remains unique!
Preferably a unique number generated by your HR system, for example an employee or badge number.
You can also make combinations to create your own identifier : firstname+lastname+joindate for example.
Just avoid using fields that can change over time.
Lastname+department for example would be a bad identifier as department can change easily.
Once you have decided an external ID at the start, it is very difficult to change this again, as it is only possible to do it manually, one by one, in the back office.
So make sure this field receives sufficient attention!
If you create a user manually by filling in the profile form, an external ID is generated automatically. This allows you to update the user information of these users in bulk by a csv upload. You can adapt this automatically generated external ID, but only manually, one by one, in the back office.
Import your data
Uploading your data manually
,#1 In the back office browse to user management. In the top right corner, click on Actions, and you’ll get a dropdown menu. Click on Upload users.

#2 You’ll be guided to a new screen.

#3 If you don’t have a CSV file ready, you can also download a template file. Click on browse and select the CSV file you want to upload. Click on Upload to continue
#4 You’ll be presented with our “your file is being processed” screen. This means we are currently processing your CSV file and doing validations in the background. You can continue using our back office, and you’ll be notified through email what the end result is of your upload.

Fix errors
Find the sync reports in the back office
Where to find the reports?
Go to ‘User Management’ and click right above the button Actions > User sync reports.
Here you get an overview of the latest user syncs, status, and the error message if applicable.
Download the csv file straight from the back office to solve the issue.
Note: You will still be notified by email when the last sync fails.

Follow-up emails after validation
After processing your CSV, we’ll send an email to the mail account configured for this feature.
You can find this email address via the Settings tab in the backoffice under “user_sync_emails”. You can also adapt the email address there.

Tip! Use a generic e-mail address that multiple people can access.
There are possible outcomes: success, or some users have failed.
Valid CSV file
When your CSV is valid, you’ll get an email similar to the screenshot below. It will give you an overview of the number of users being imported. As indicated in the mail, depending on the number of users, it can take up to a couple of hours before all of them start appearing in the back office.

Validation errors detected
In some occasions, we’ve encountered some validation errors in your CSV file. You’ll get an email similar to our screenshot below. It will give you an overview of the number of users whom we’ve encountered errors with.

How to check what went wrong?
Ok, so there were some validation errors in your original CSV, let’s find out which ones!
When you open the CSV, you’ll find the exact entry you’ve been trying to upload, scroll to the column name errors (at the end of the file).
As you can see in the screenshot below, the format of this person’s businessMobilePhone was incorrect.

The big win is that you can correct the wrong value and use re-upload this CSV in our back office. You don’t even have to remove the error column, as we neglect this column while processing.
How to update user information
Manually change/update information in the back office
To update user information navigate to Users > User management. Click the user you’d like update.

You’ll find all personal information fields Spencer keeps on users – some filled out, some empty.

Fill out any empty personal information field (e.g. Region) and click Update and close, which will take you back to the user overview page.

Please keep in mind that user synchronization runs daily (if being set up) – overwriting any manual updates you have done through the back office. Hence, it only makes sense to update fields that are not part of the synchronization process.
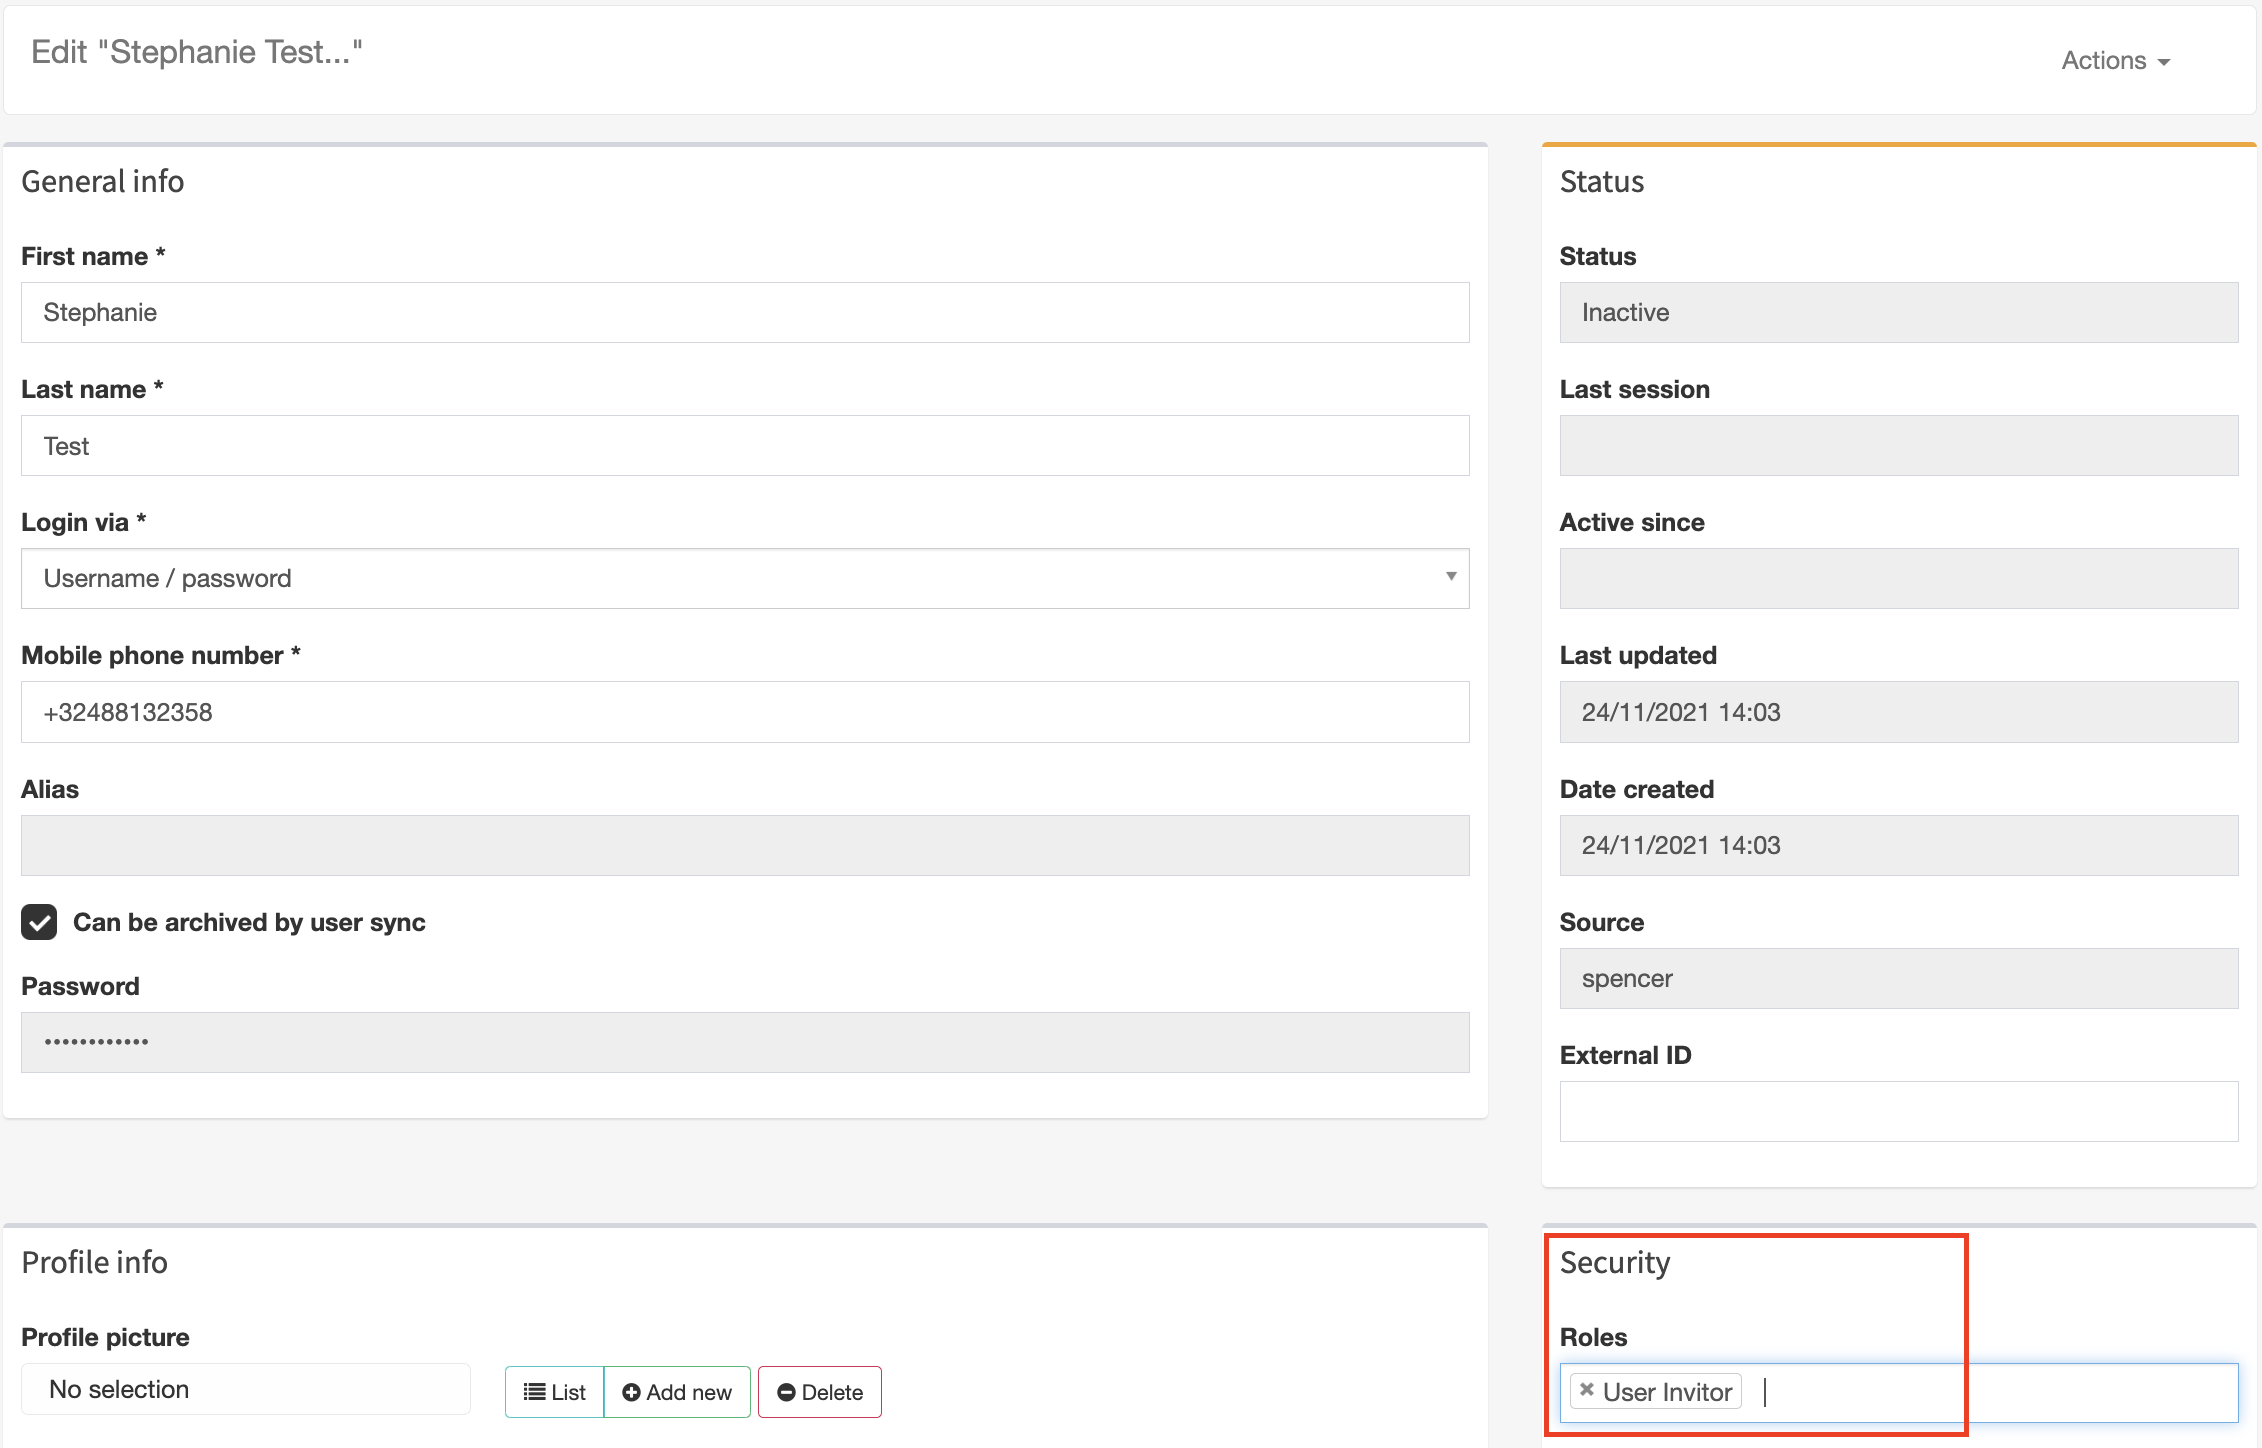
Let a User Invitor update mobile phone number and email address
To ensure an employee can log in to the app with their personal email address or phone number, this information has to be filled in and up to date. Sometimes this is not the case.
-
That’s why we have added the possibility to assign the role of User Invitor via the user detail page.
-
This user will be able to edit the private email address and phone number of any user who does not use Single Sign-On to log in to the app.
-
When these changes are edited, a flag will be added so user syncs will not overwrite these fields in the future.
- This makes it easier for ambassadors (communication or HR professionals, team leaders …) to boost adoption and update the user information so colleagues can log in to the app.
This feature is added since the 23.5 update, but currently only available for iOS users. from the next 23.7 update on, it will also be available for Android users.
Which information is shown on the user’s profile?
There is no option, to turn off/on fields, by default, we don’t show fields that aren’t pre-filled.
What is shown?
Below, we’ve listed the fields that are visible if filled in (in random order):
- First Name
- Last Name
- Manager
- Business email
- Business phone
- Profile picture
- Contract type
- Department
- Division
- Subdivision
- Job Title
- Domain
- Company
- Subsidiary
- Employee code
- Date of birth
- Business phone
- Country
- Region
- Zone
- Default Site
- Work Station
- Company Join date
- Preferred language
What isn’t shown?
- External ID
- Alias
- Source
- Authentication type
- Private email
- Private phone
- Tags
Any questions?
Our Customer Success team is here to make your life easier!