How to create a user list
User lists allow you to target your communication to the relevant audiences. There are different types of user lists, so below we go into detail about each one of them.
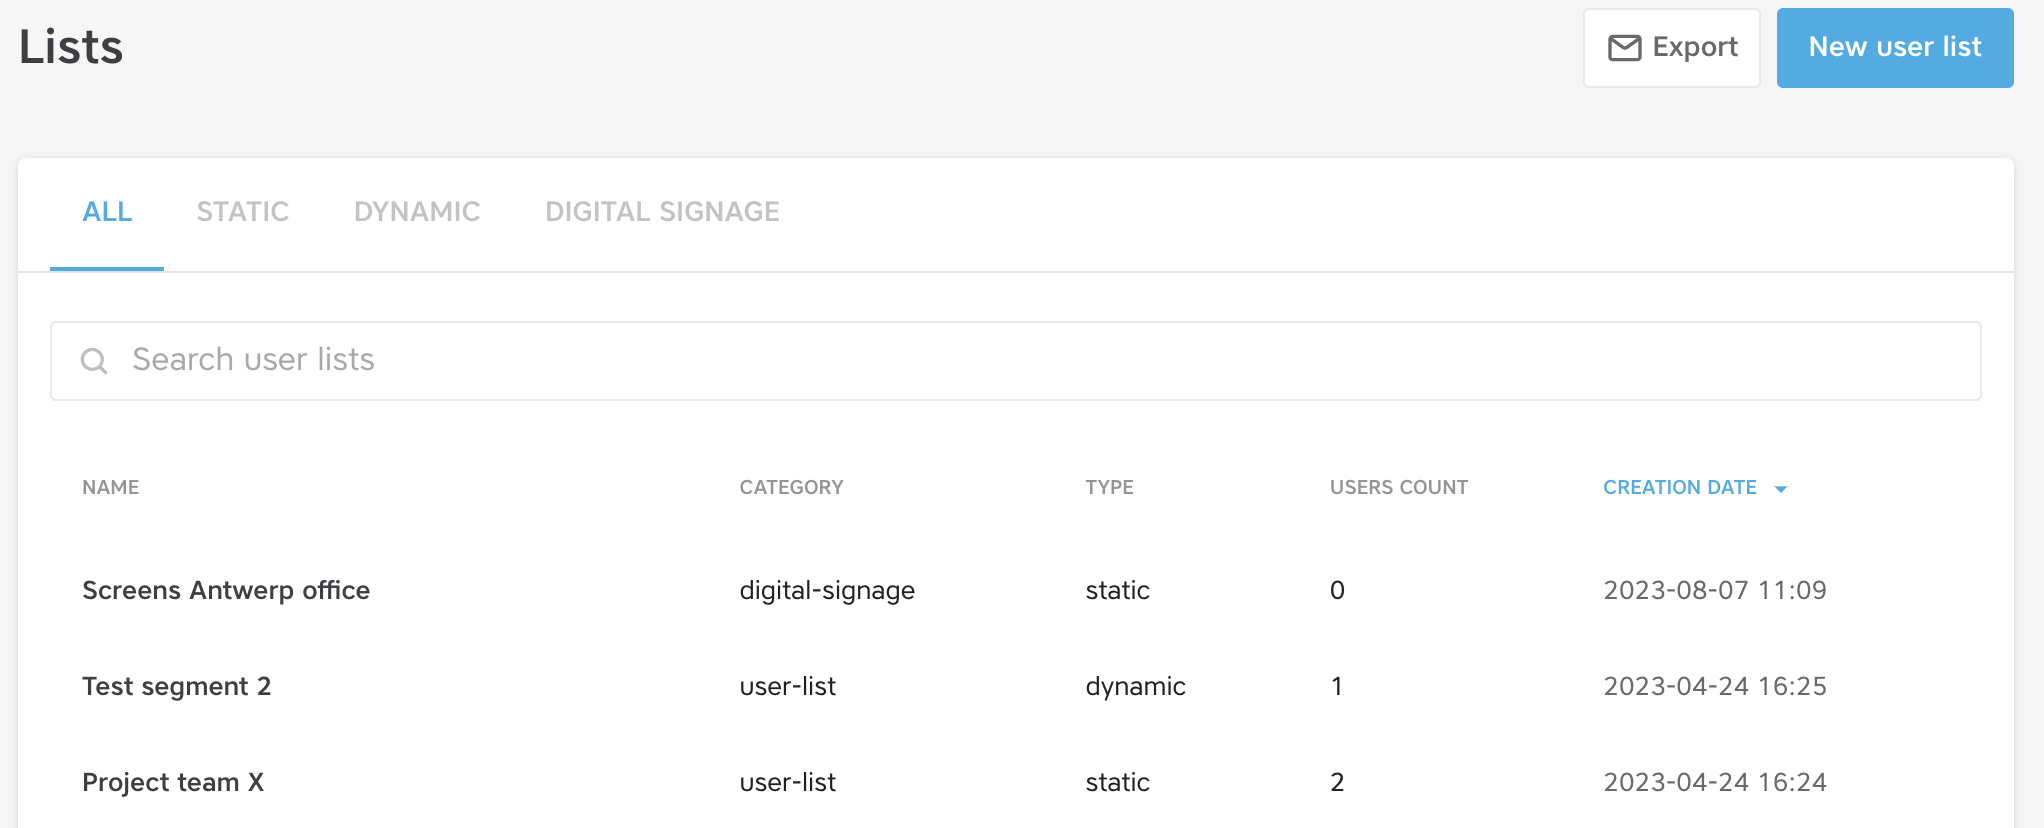
Go to Users > User lists to see an overview of current user lists in your back office.
What do you see in this overview?
- The name of the list – Tip! If you plan to create a lot of lists, we advise to keep a fixed structure for the names of the lists to make it user friendly in the future. E.g. country – site – type of employee, so BE – Waregem – blue collars.
- The category of the list: is it a regular user list or a user list related to digital signage?
- The type of the list: is it static or dynamic?
- The amount of users in the list
- The creation date of the list
Start to create your list
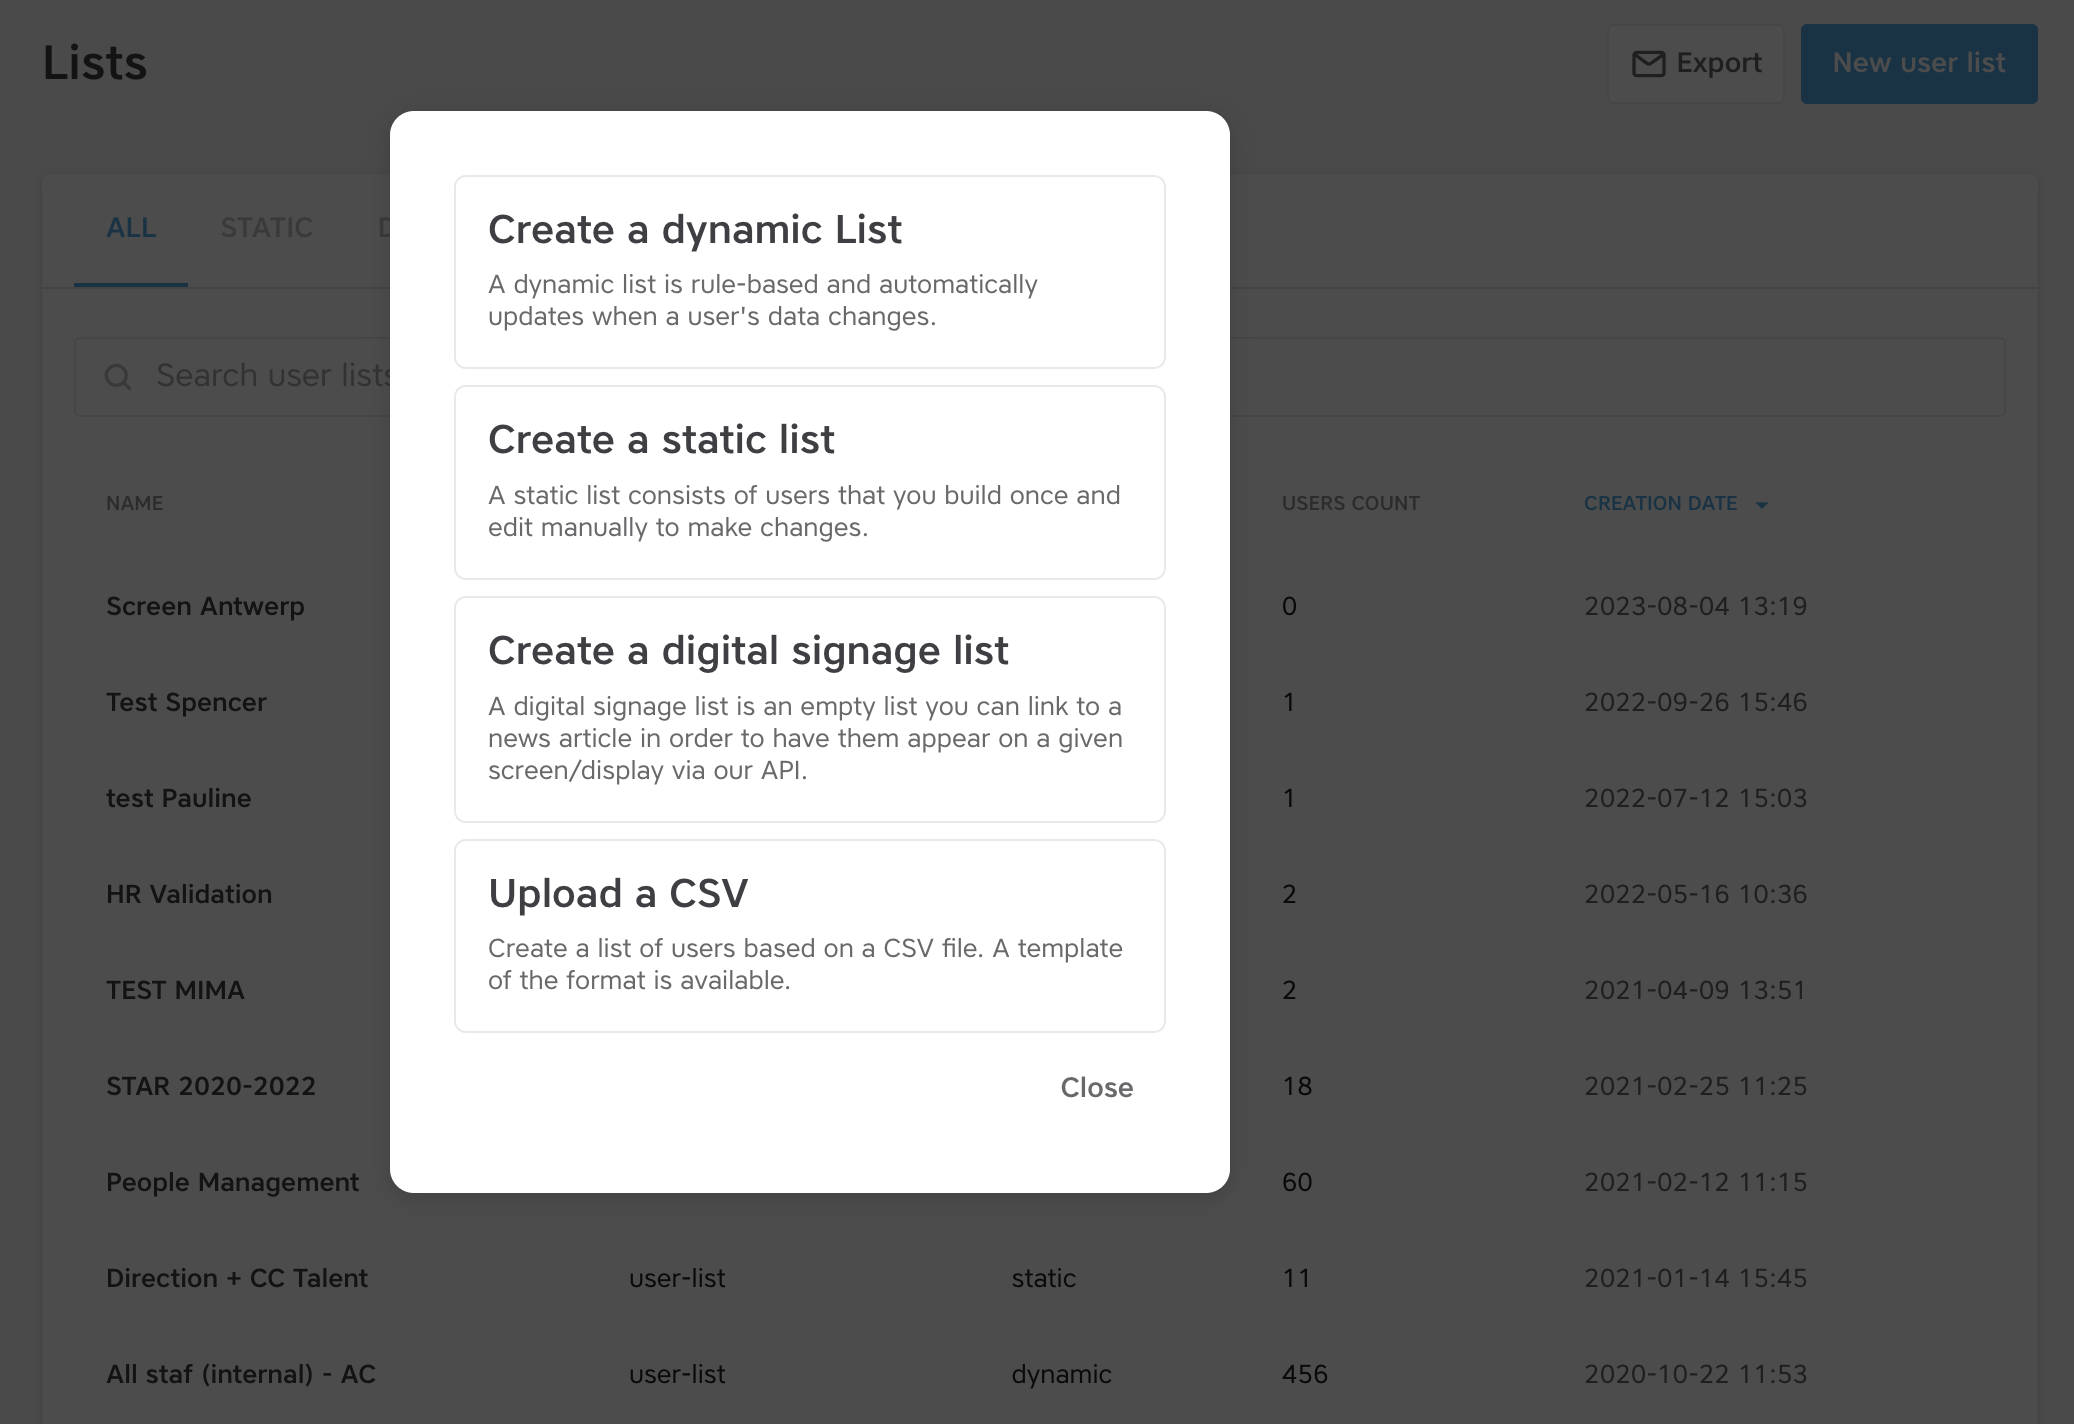
Click on “New user list” in the top right corner and choose the type of list you want to create.
1. Create a dynamic list
A dynamic list is rule-based and updates automatically whan a user’s data changes. It refreshes constantly, adding users who match the criteria and removing users who don’t. The criteria are based on user data available in Spencer.
Select the criteria for your list
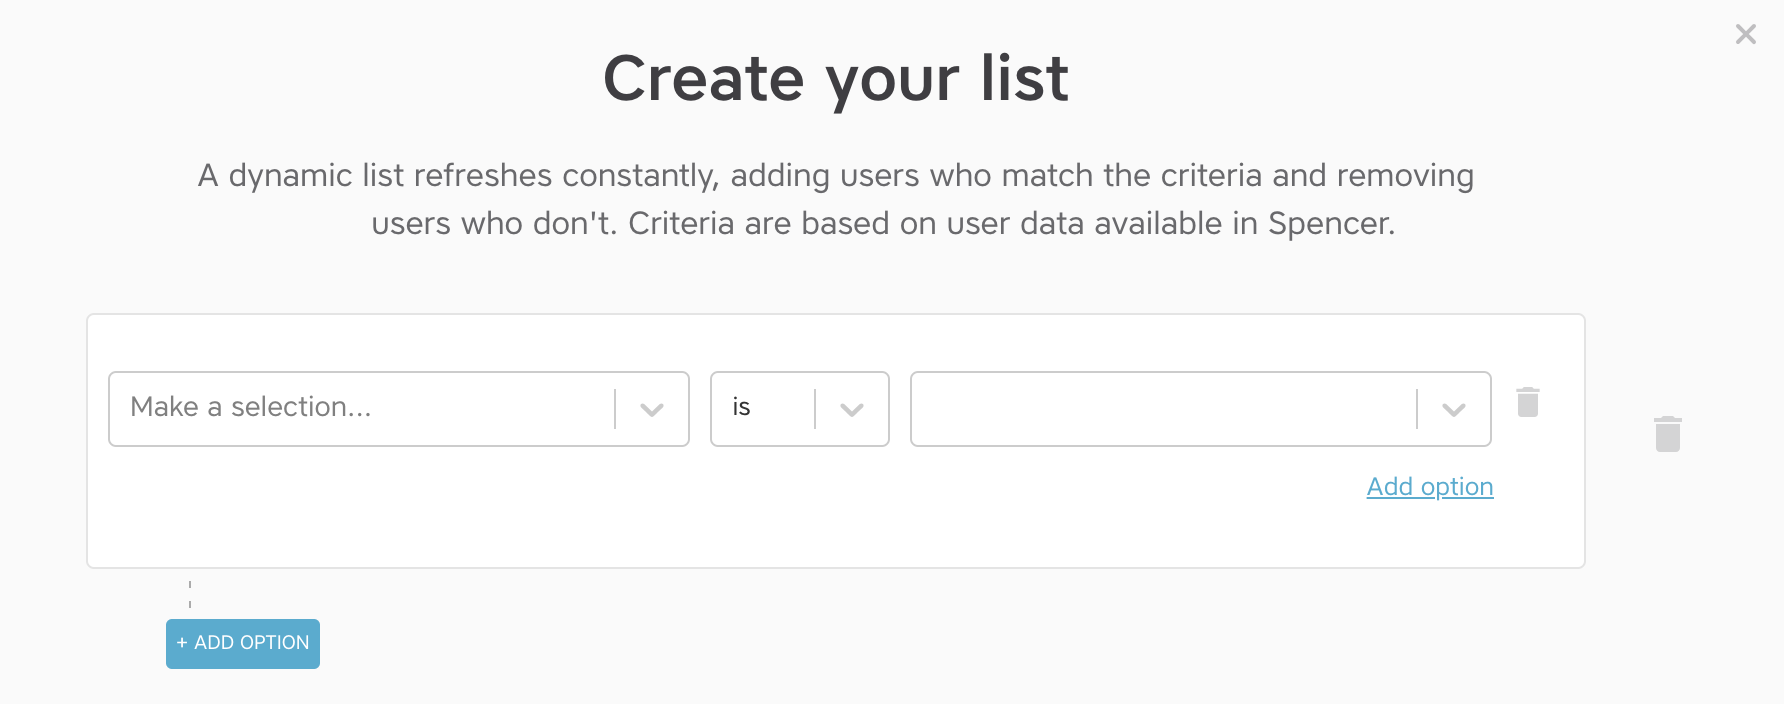
As criteria to build your list on, you can work with the user data available in Spencer. You can also work with the tags added (read more about creating tags in this post).
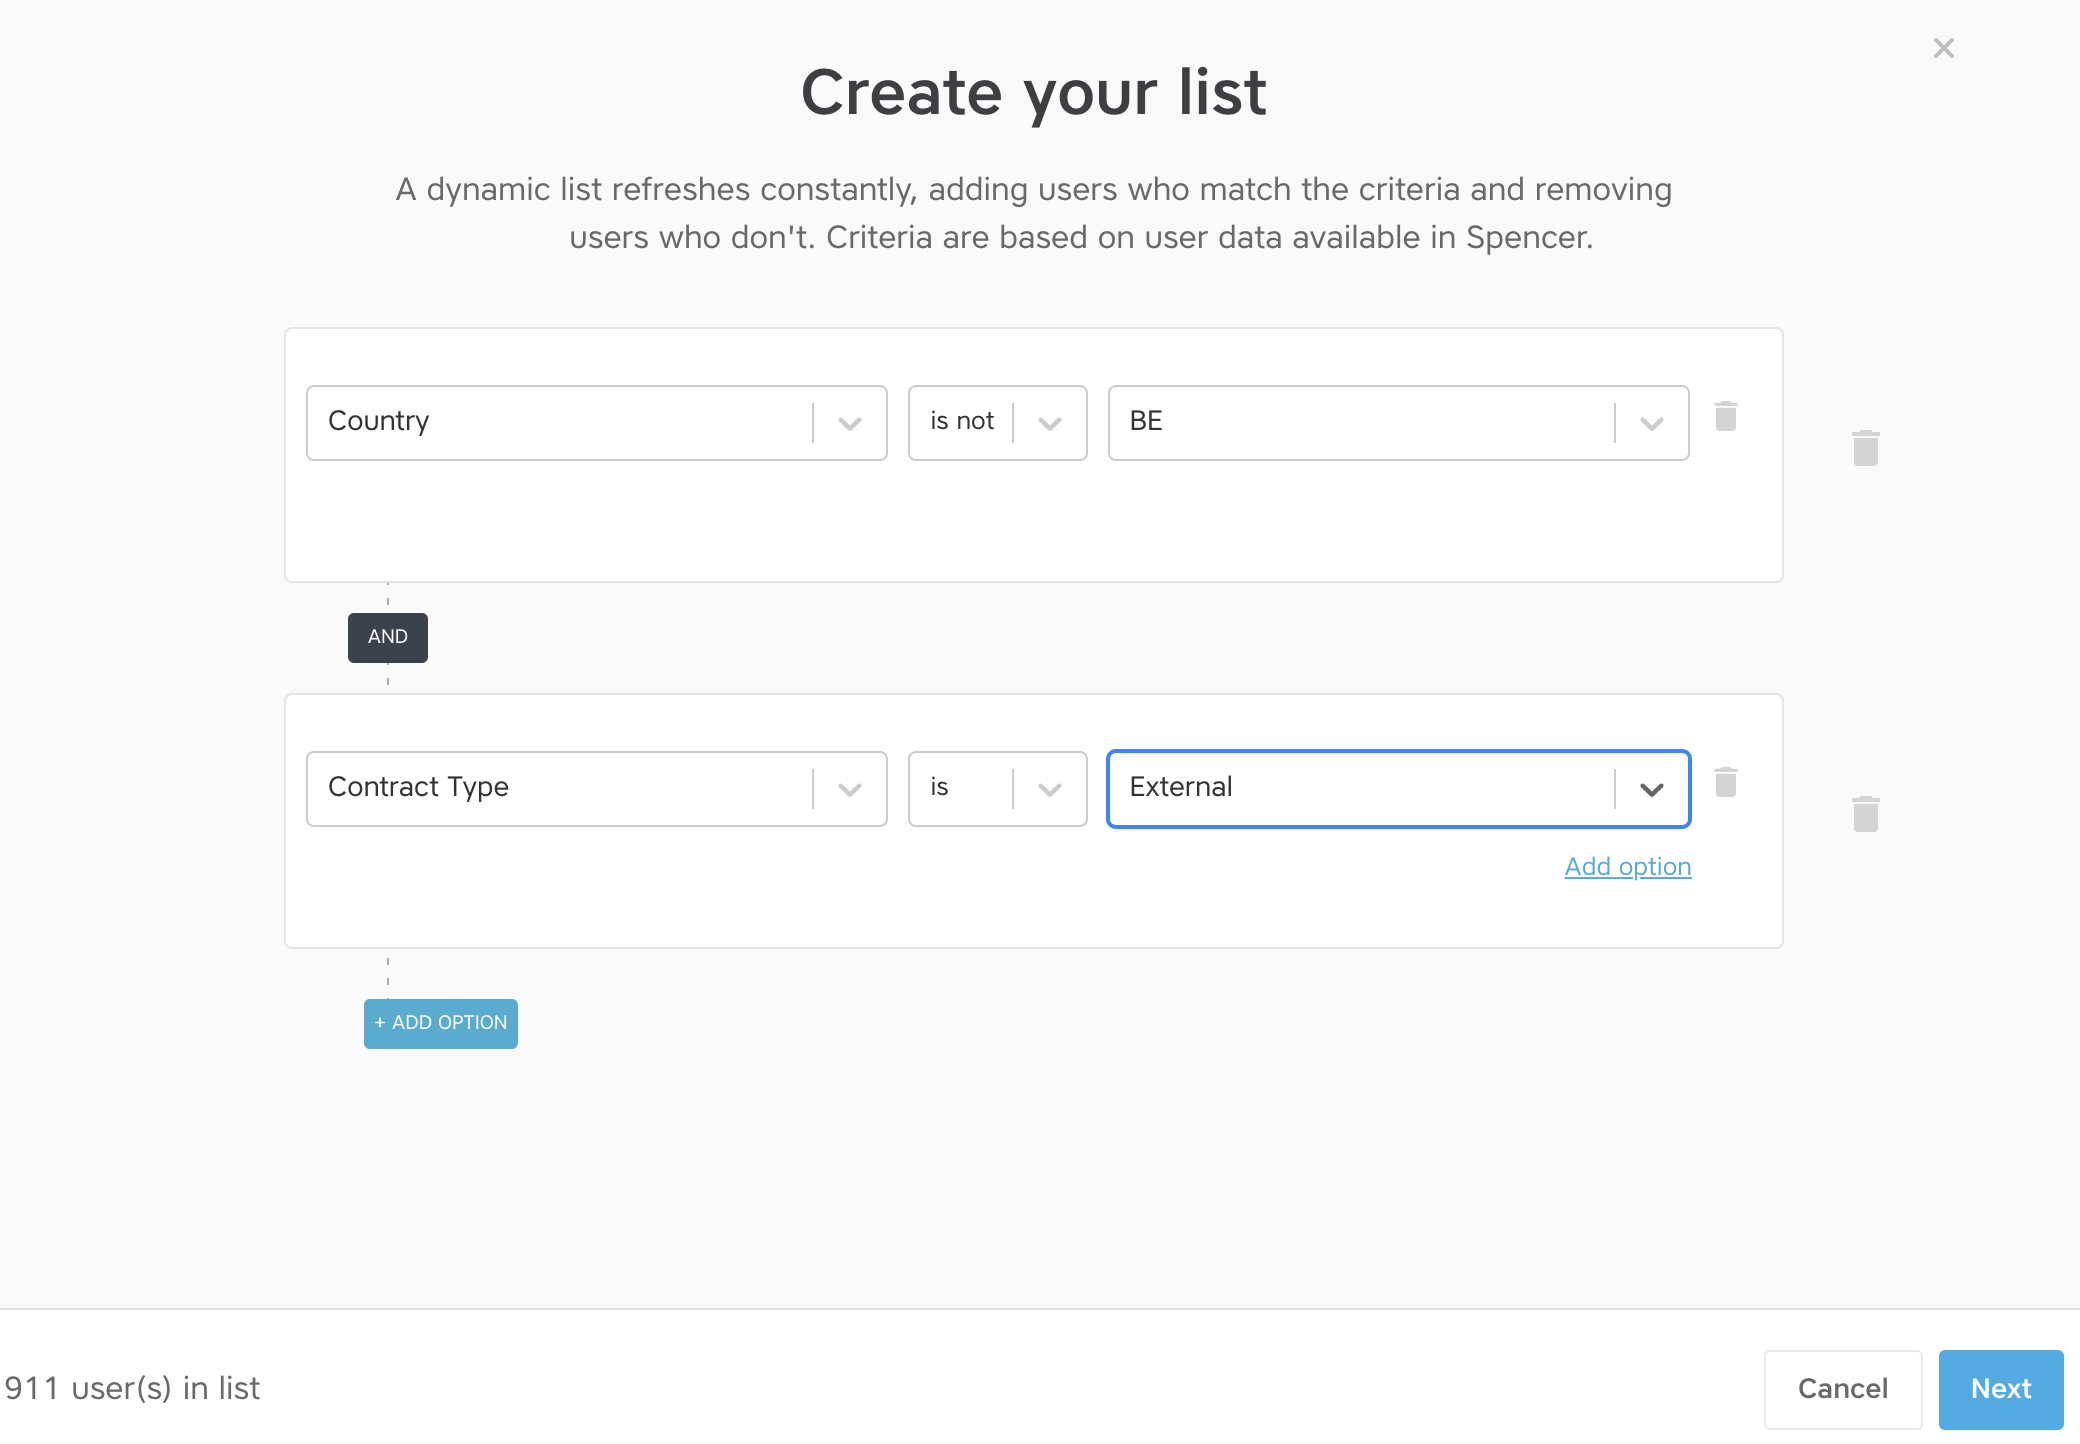
You can make a list based on inclusion (IS) or exclusion (IS NOT). You can also combine different criteria. If you do so, you should select the broadest criterium first and then the more narrow one.
For example: a list with all employees who are not based in Belgium and have an external contract type. In the left bottom corner, you see the amount of users included in the list.
If you have selected all necessary criteria, click “Next”.
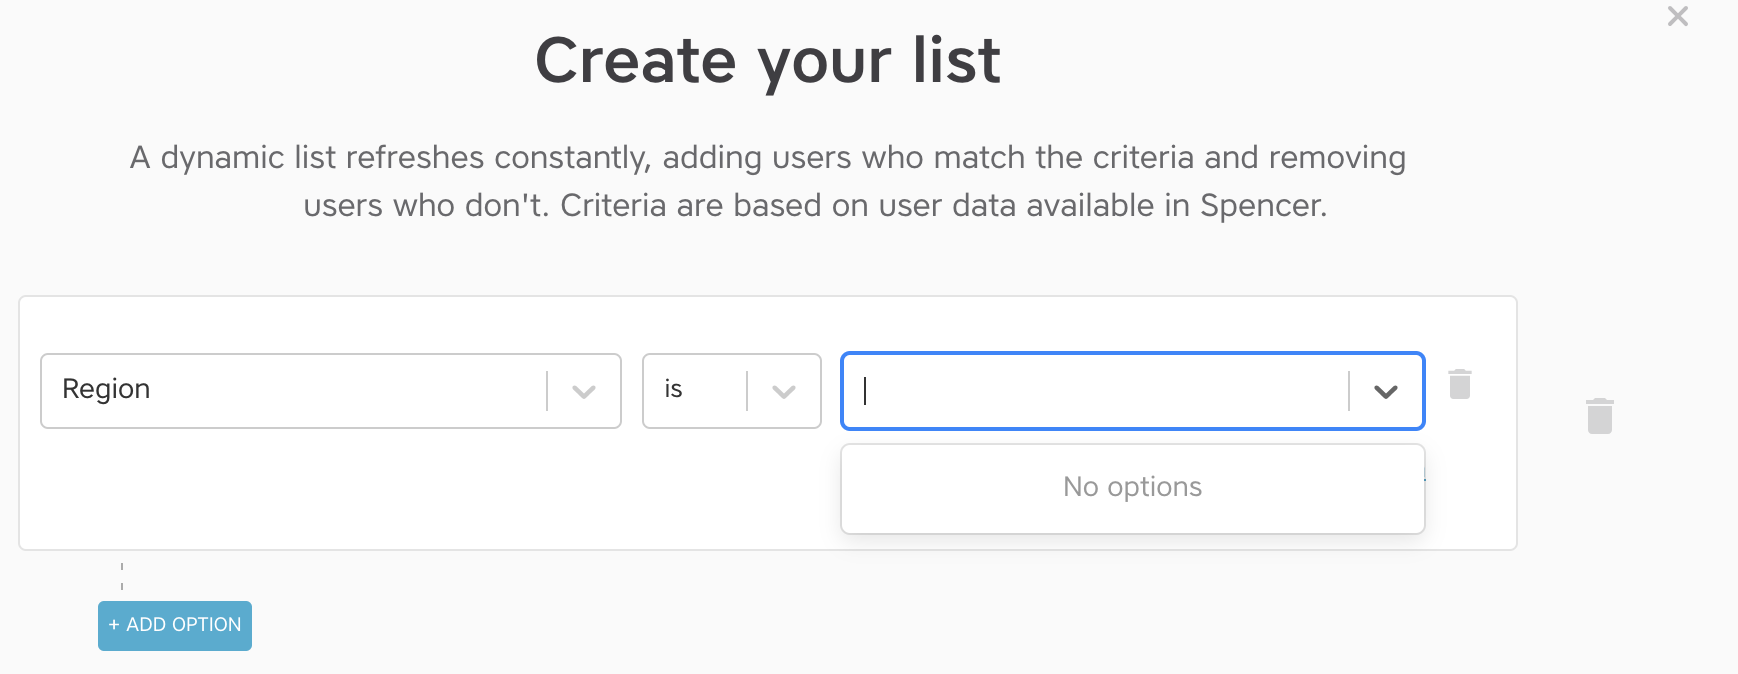
In case you select a criterium for which there is no data available, you will see that there are “no options” available.
Combining different values for one criterium
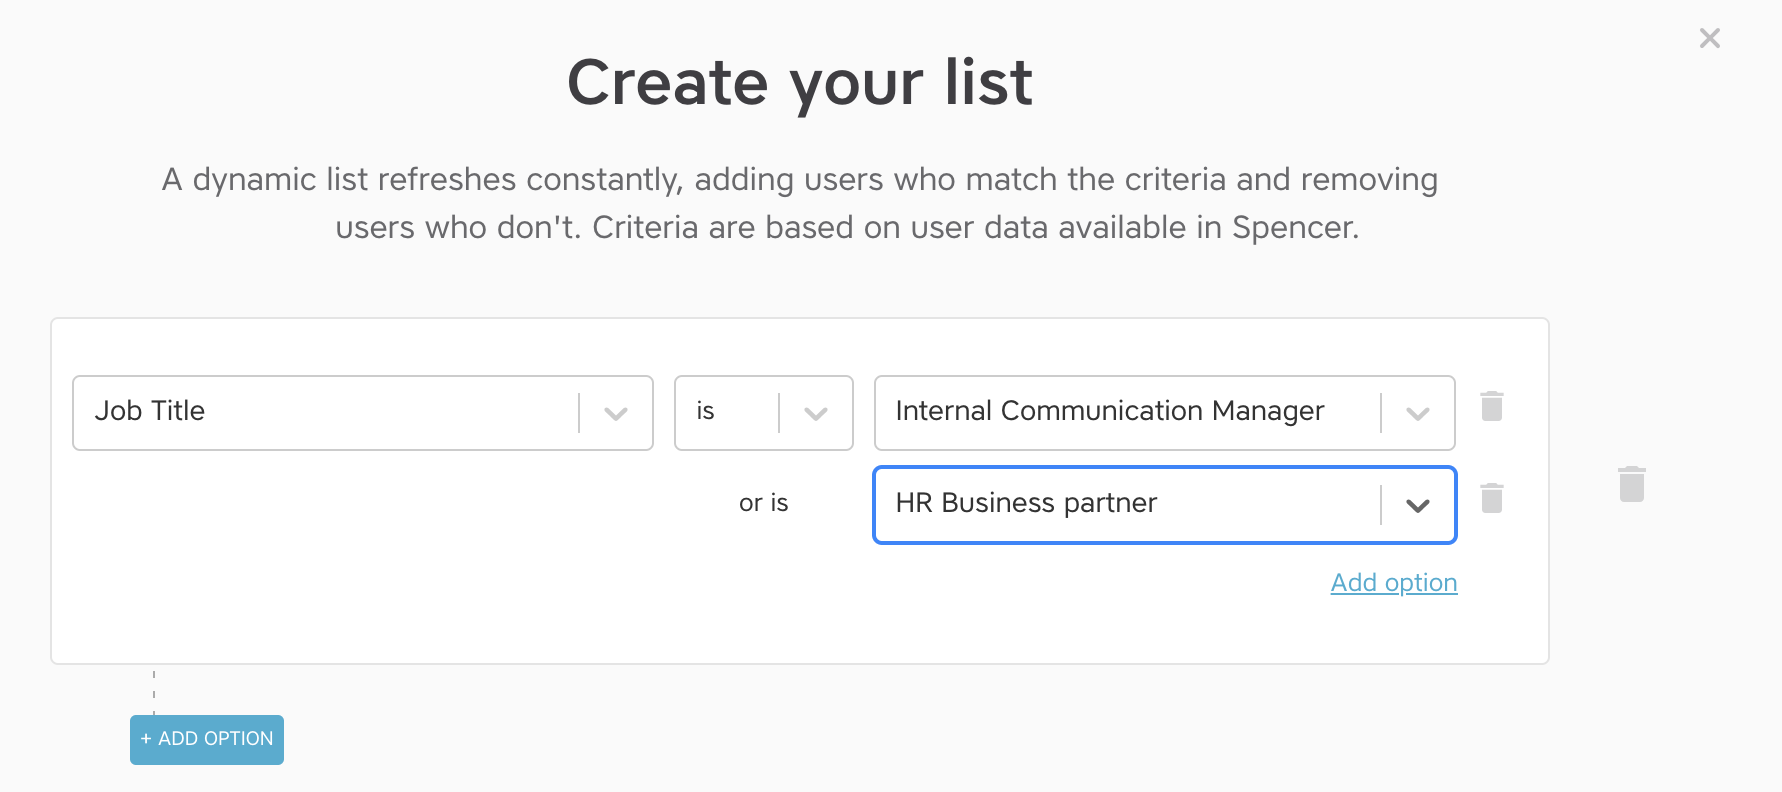
If you want to create a user list where you include more than one value for a given criterium, you can click the “Add option” button.
Finalize your list
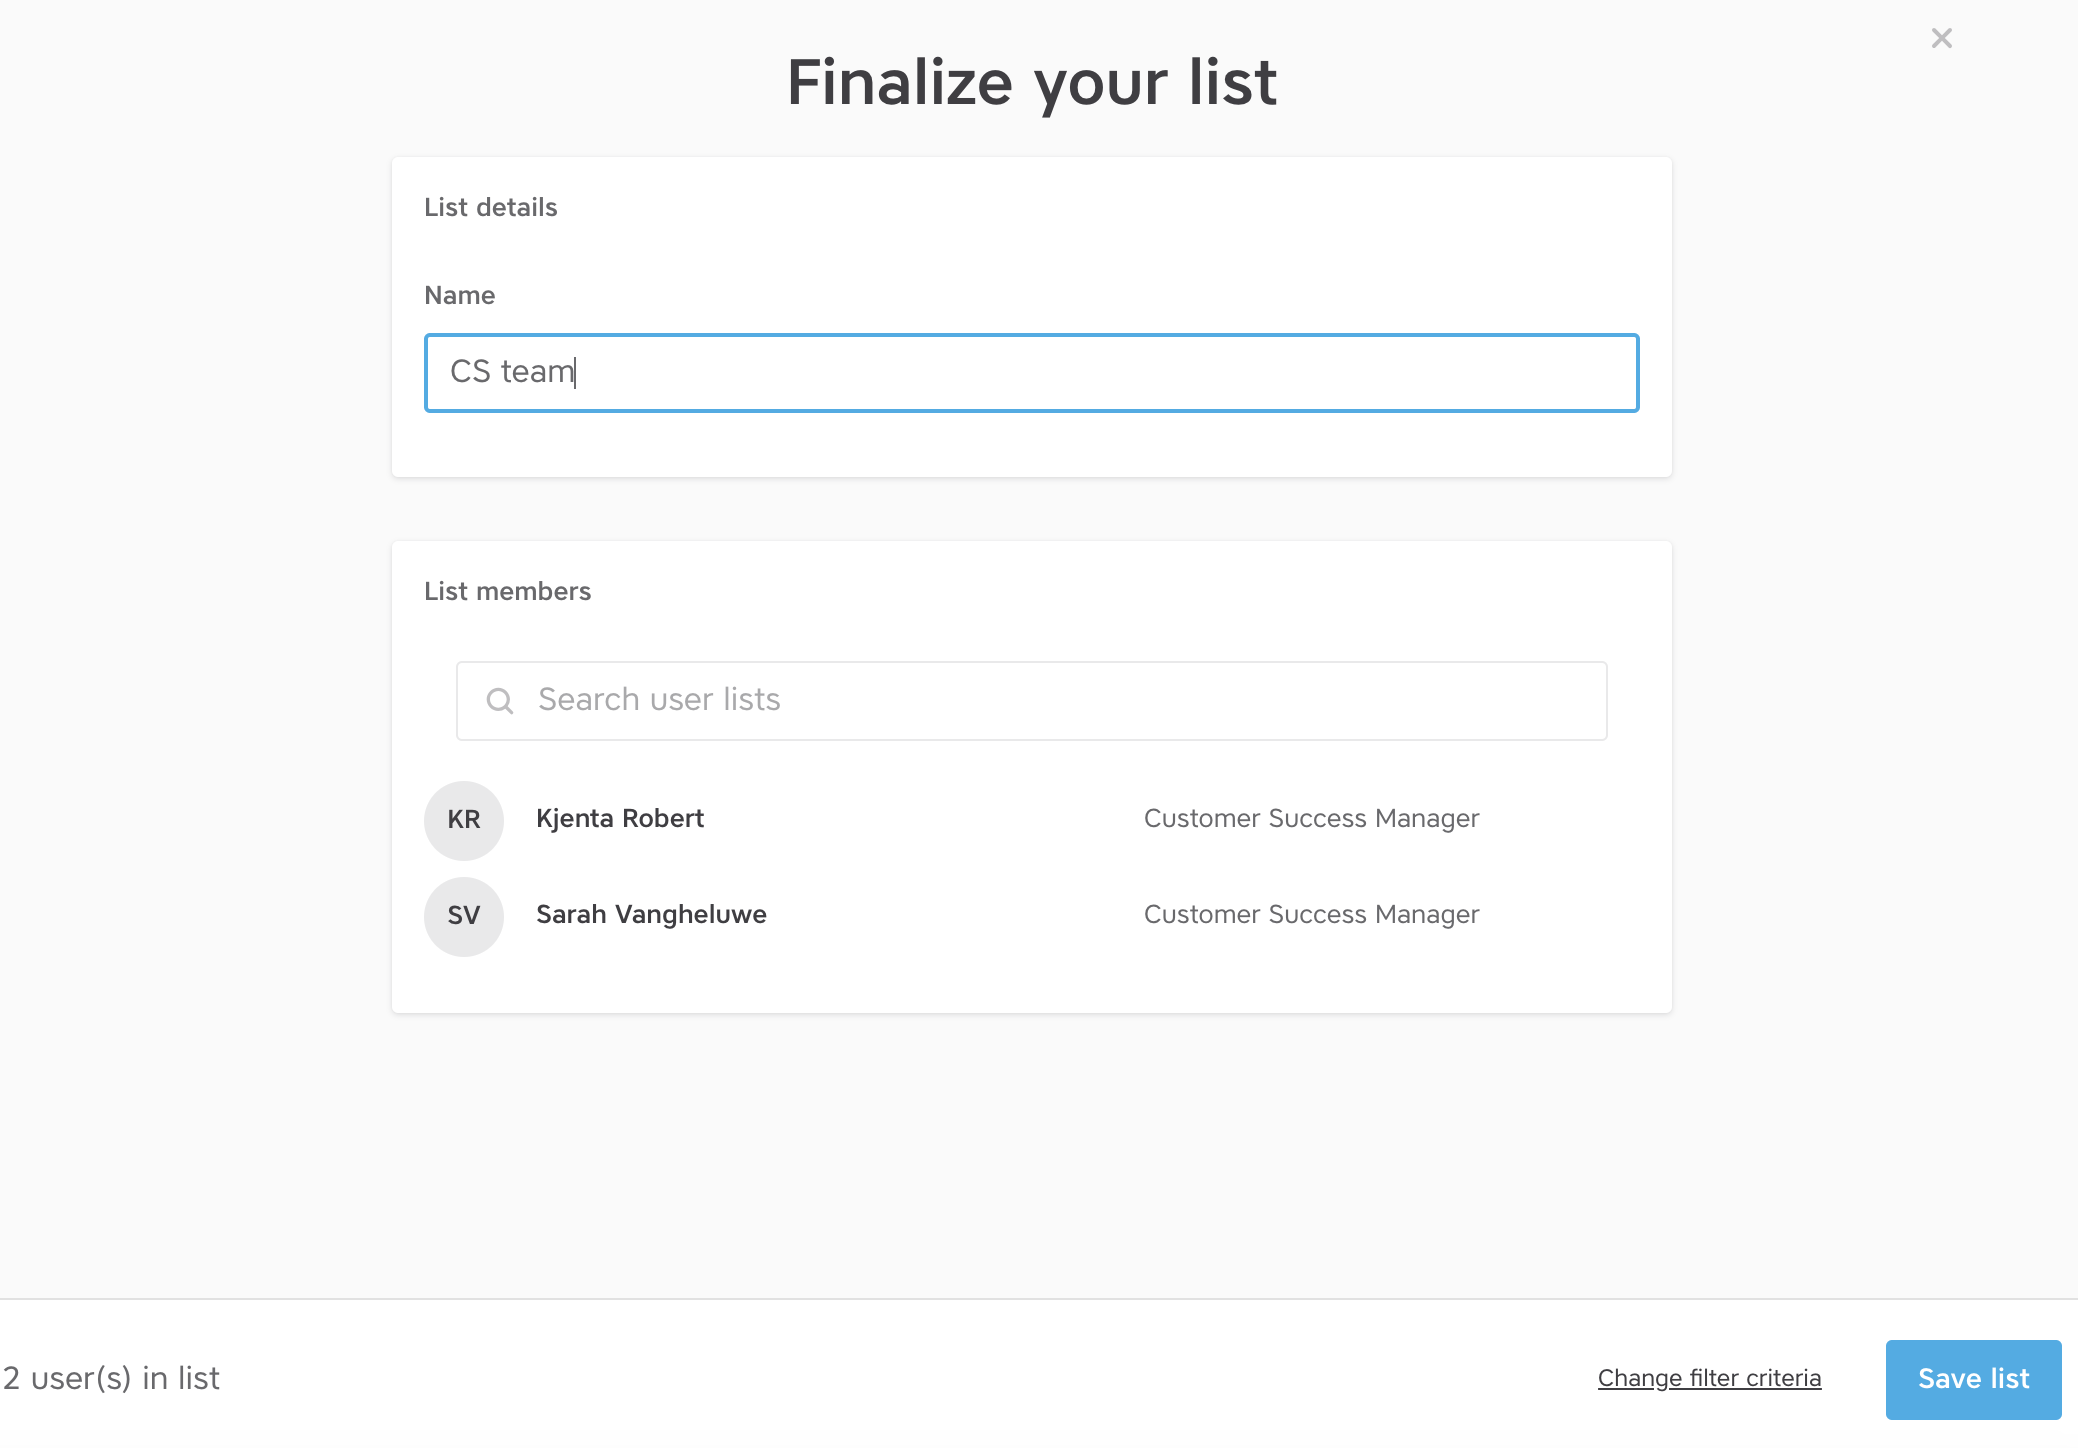
In this screen, you give your list a name.
Tip! If you plan to create a lot of lists, we advise to keep a fixed structure for the names of the lists to make it user friendly in the future. E.g. country – site – type of employee, so BE – Waregem – blue collars.
You can also see and search all list members.
Made a mistake? Click “Change filter criteria” to return to the previous screen.
Finally click “Save list” to save your list.
2. Create a static list
A static list consists of users that you build once and edit manually to make changes.
We advise to only use this kind of list for:
- small lists that will not need regular updating
- or for temporary lists, like participants of a training or an event.
Select the members for your list
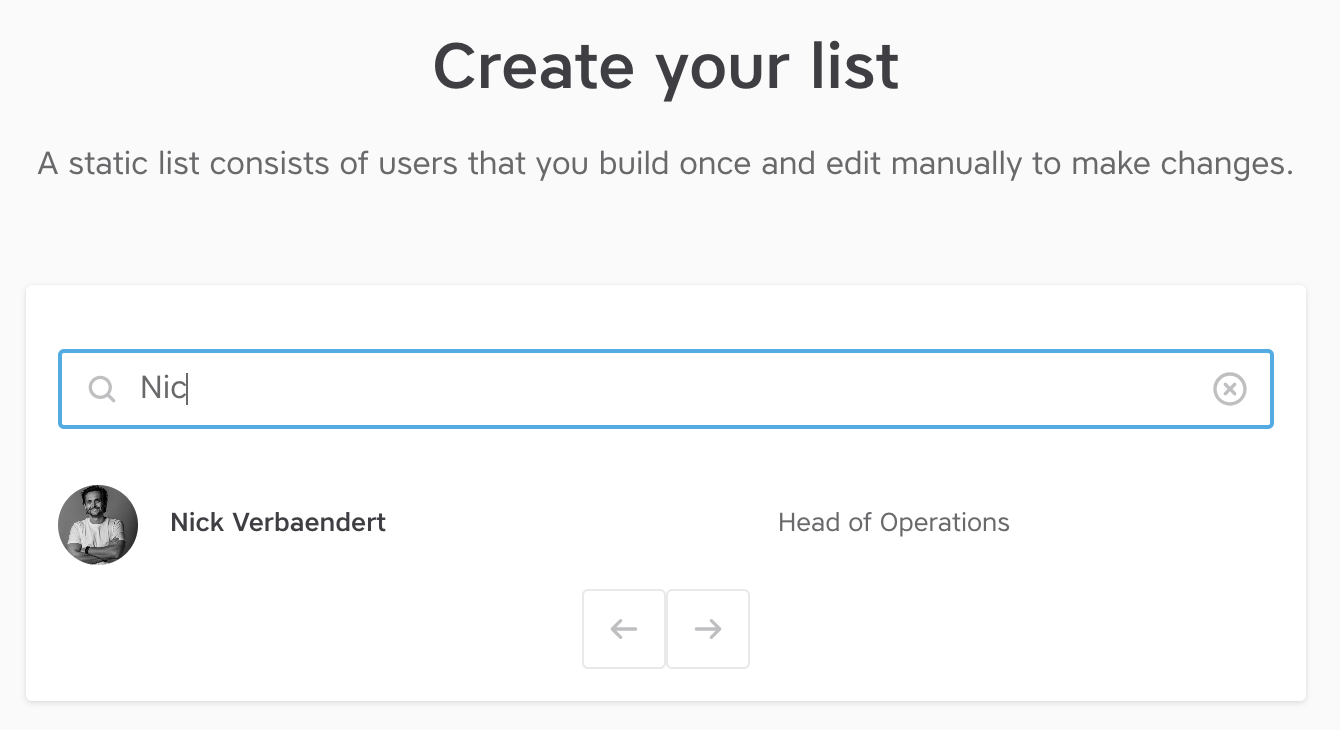
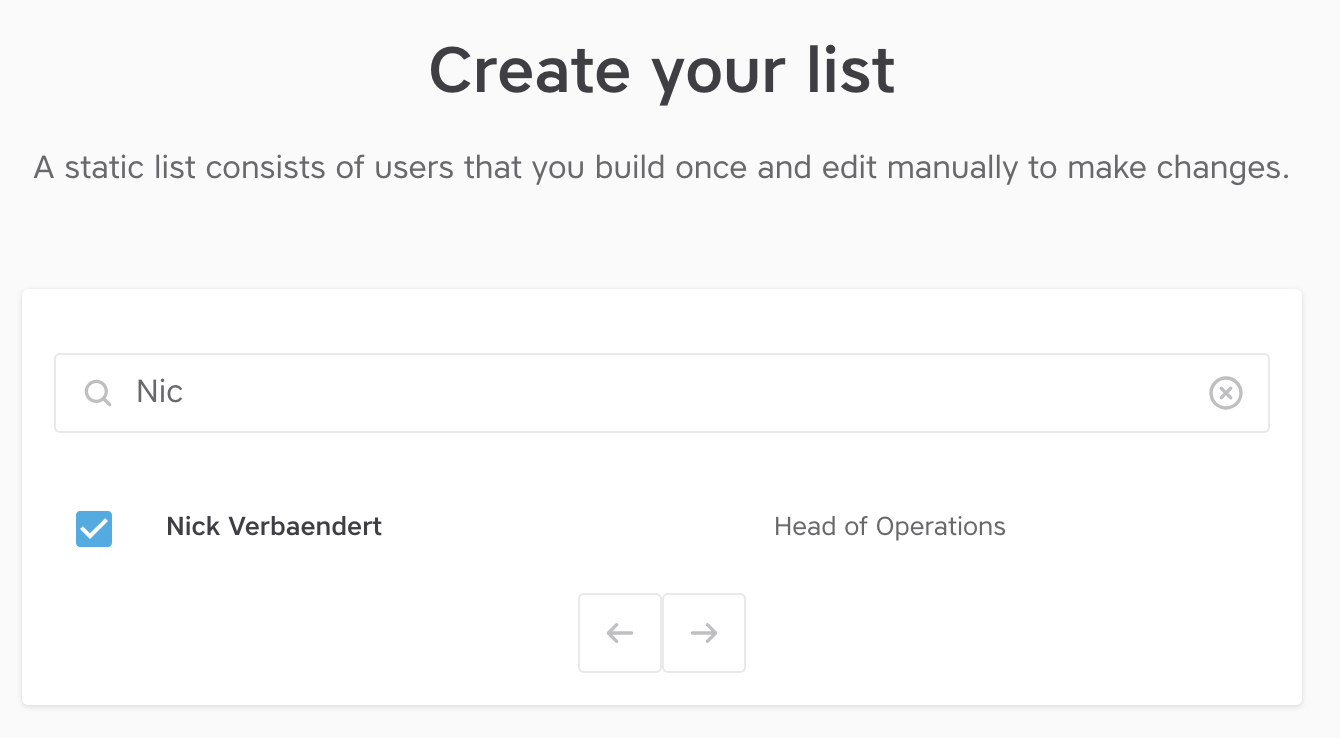
First, select the members for your list. You can start typing in the name of the person you want to add and below you will see a list appear with all corresponding names.
Next, select all users that you want in your list, and as such build your list.
If you have added all necessary users, click “Next” in the right bottom corner.
Finalize your list
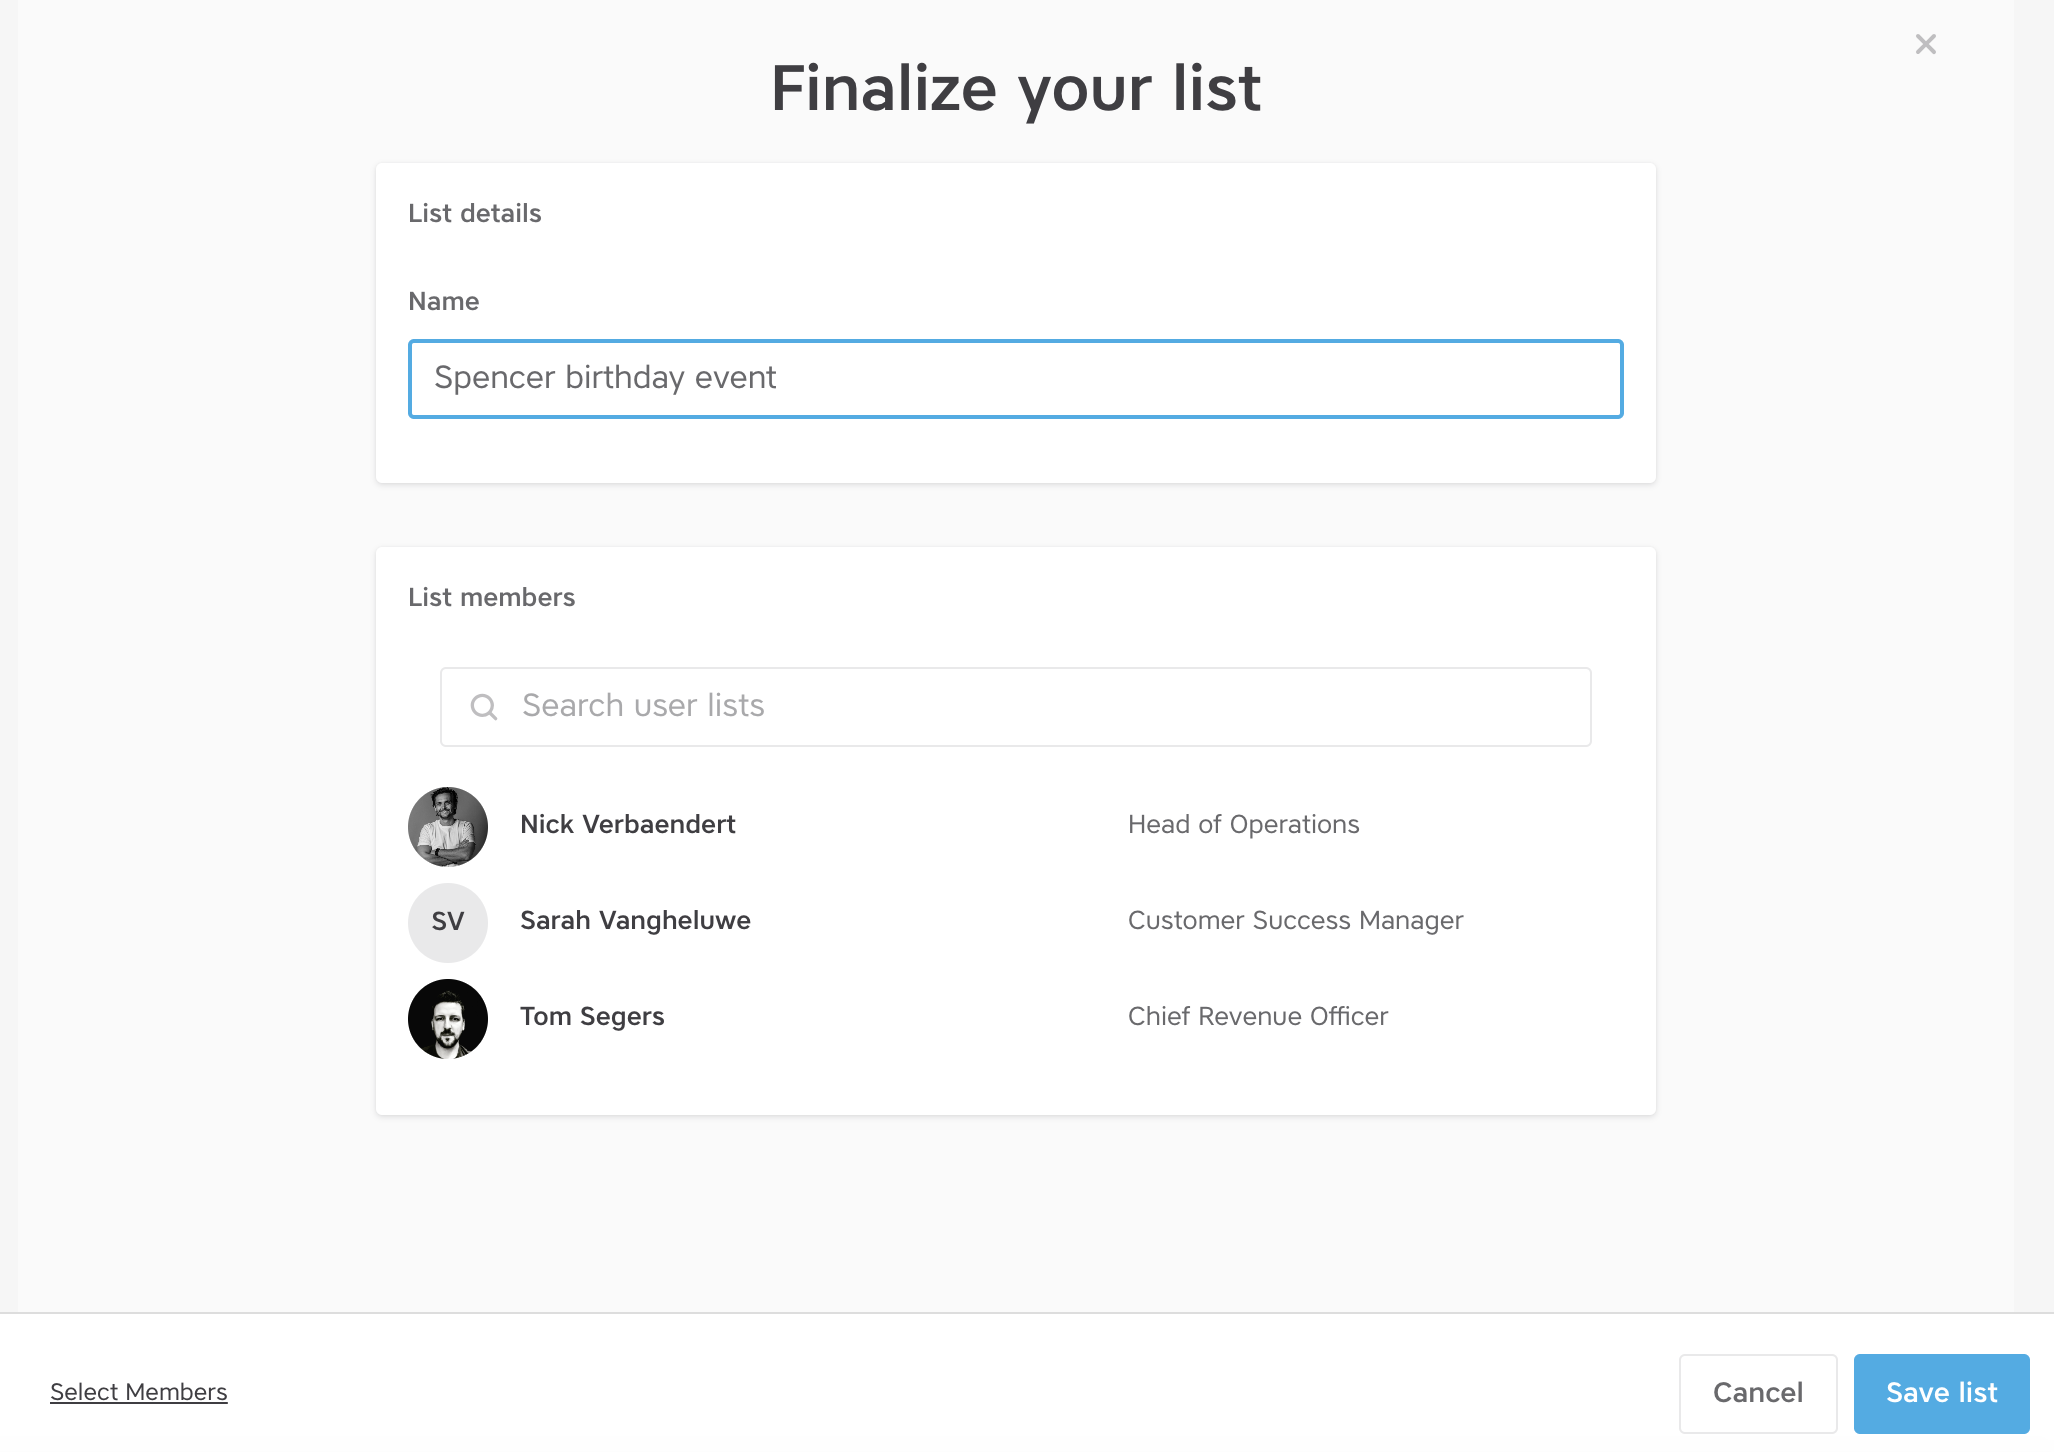
In this screen, you give your list a name.
Tip! If you plan to create a lot of lists, we advise to keep a fixed structure for the names of the lists to make it user friendly in the future. E.g. country – site – type of employee, so BE – Waregem – blue collars.
You can also see and search all list members.
Made a mistake? Click “Select members” to return to the previous screen.
Finally click “Save list” to save your list.
3. Create a digital signage list
A digital signage list is an empty list you can link to a news article in order to have them appear on a given screen/display via our API.
Your screens are not yet connected to Spencer? Or you want to start using digital signage and are interested in an integrated solution with Spencer? Reach out to our Customer Success team via the button below to discuss the possibilities.
Finalize your list
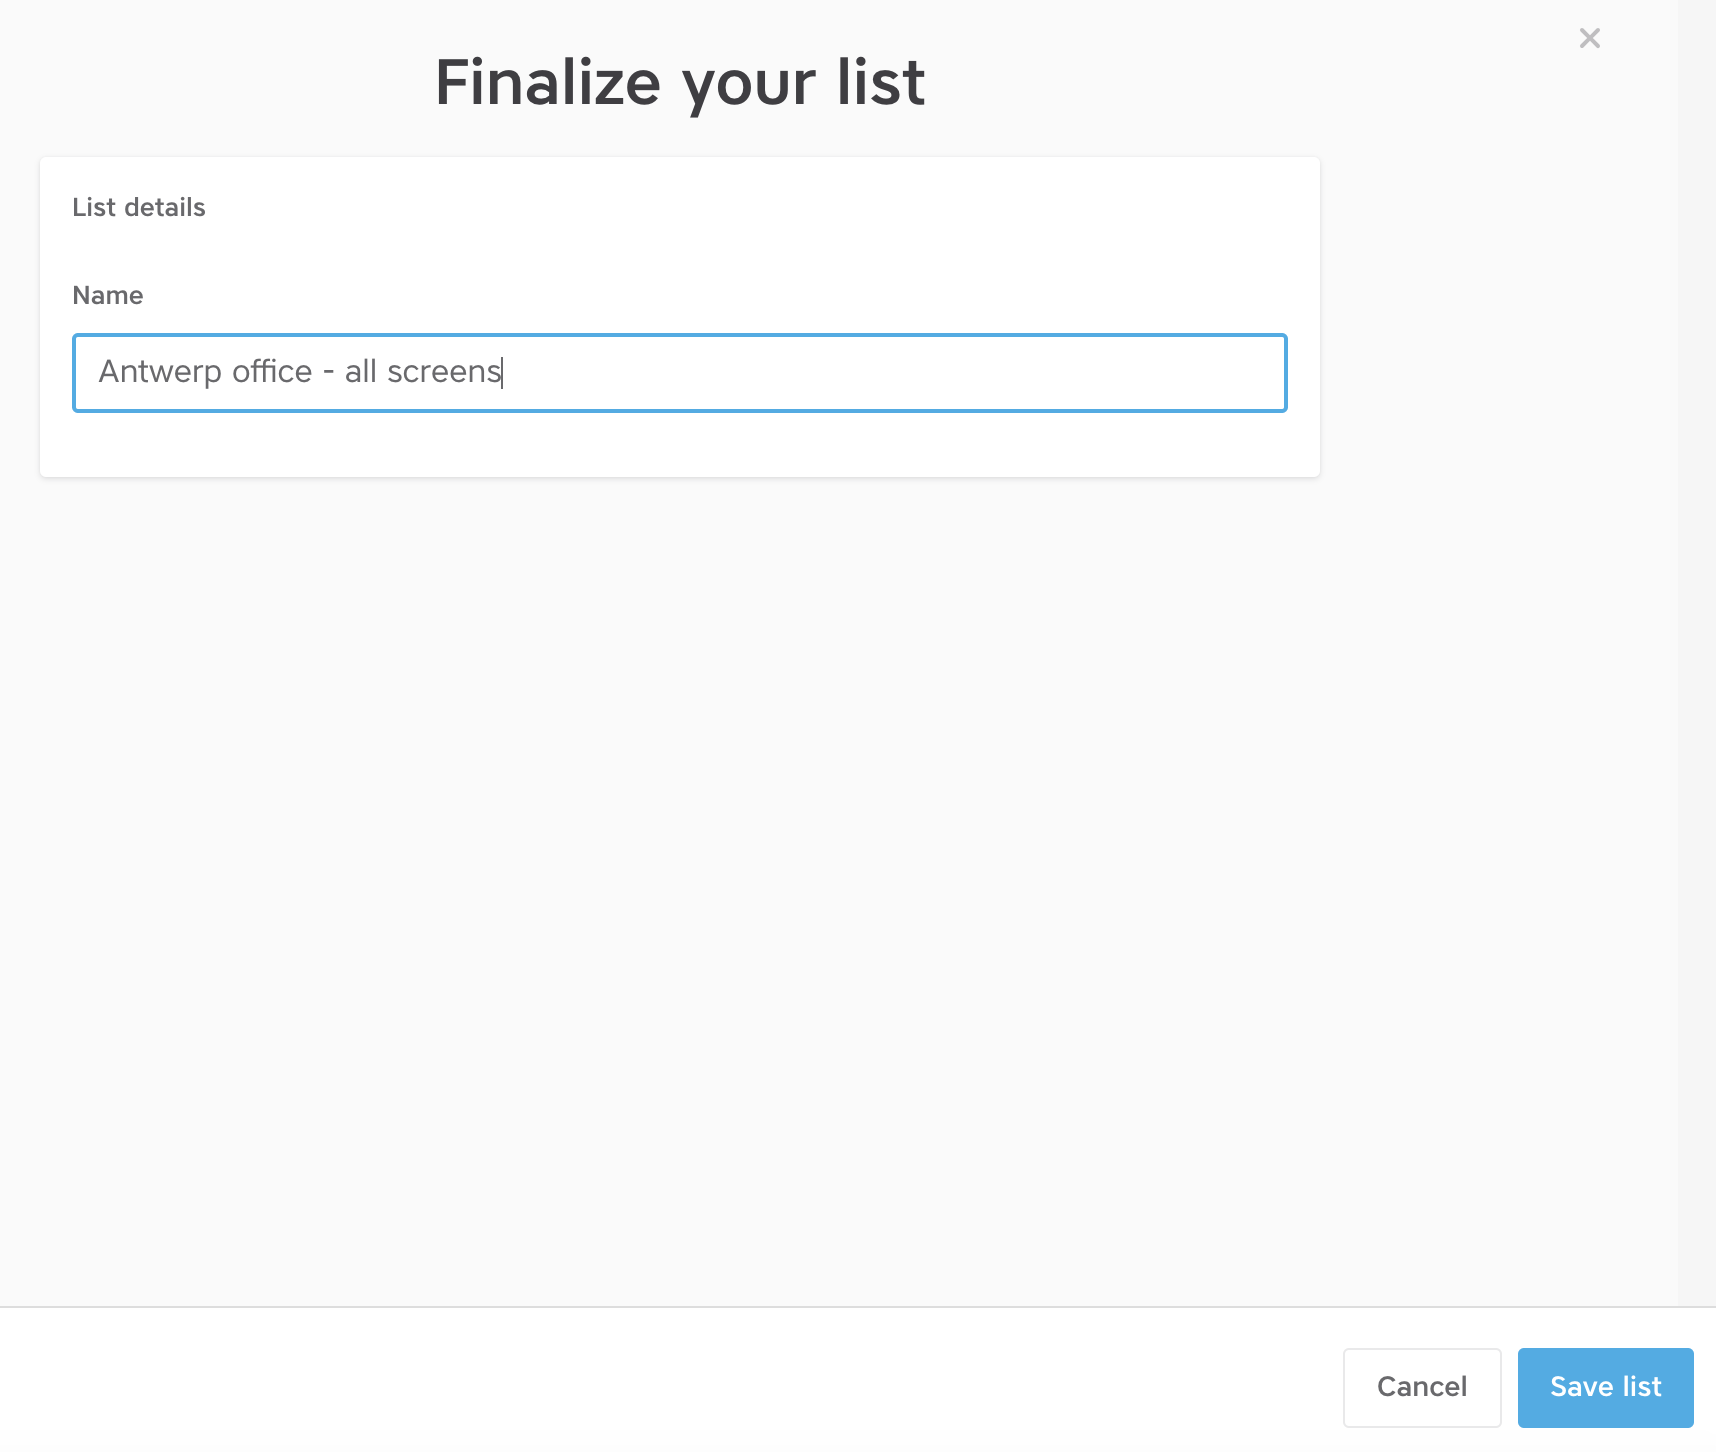
In this screen, you give your list a name.
Tip! If you plan to create a lot of lists, we advise to keep a fixed structure for the names of the lists to make it user friendly in the future. E.g. country – site – location of the screen, so BE – Waregem – reception area.
Finally click “Save list” to save your list.
Connect lists and screens
After you saved the list, you will see the overview of all lists again, with your new digital signage list on top.
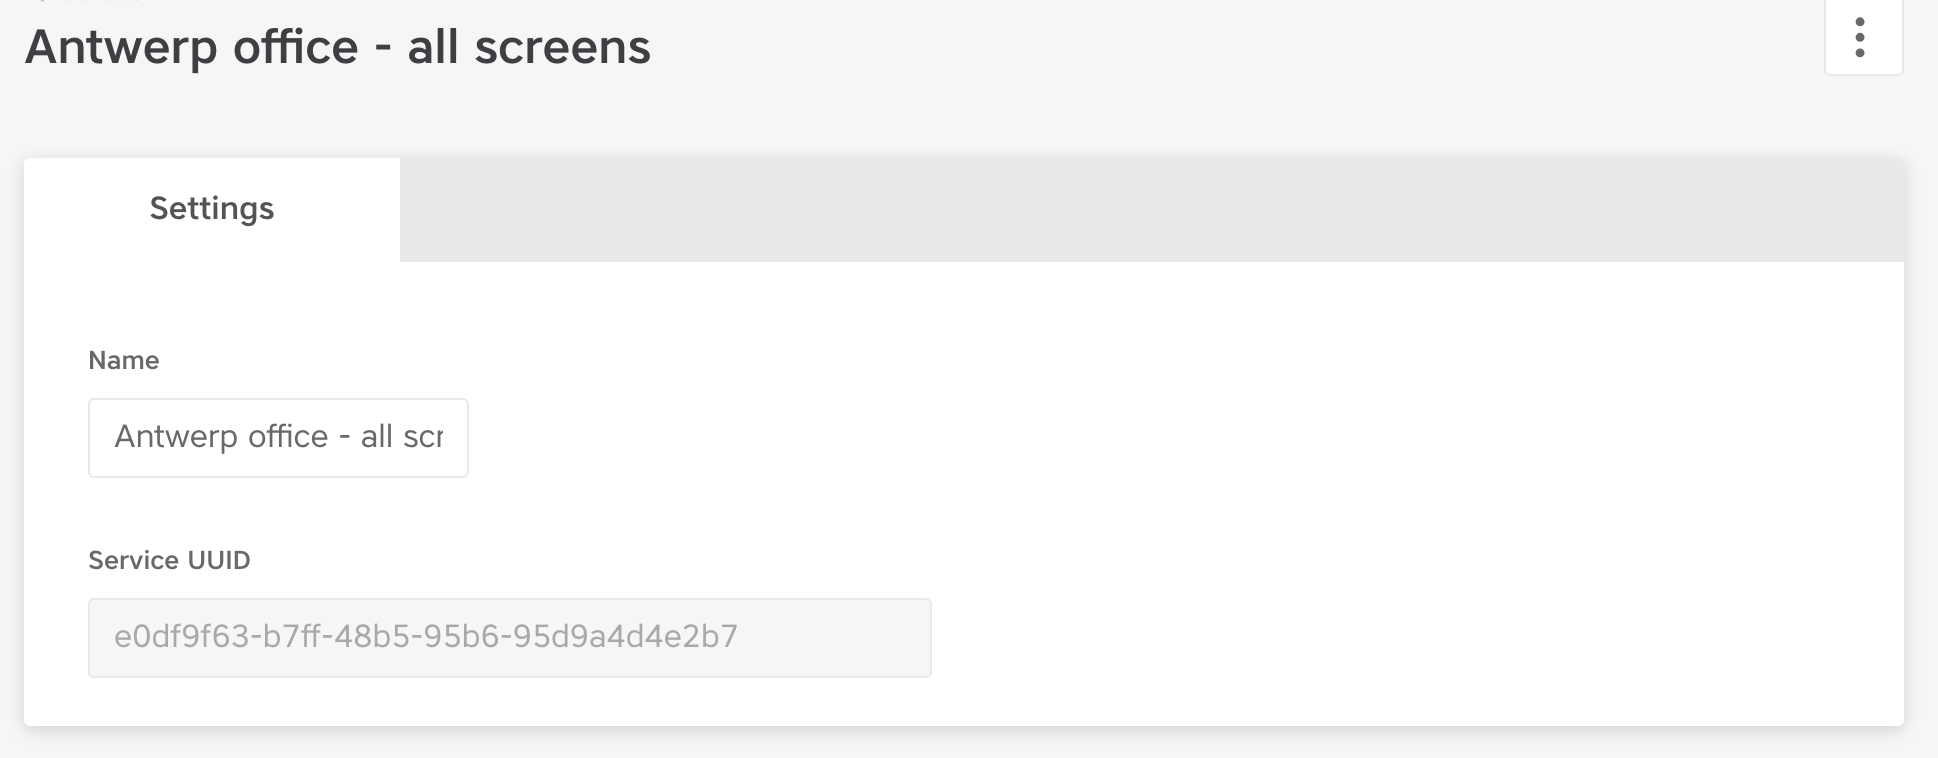
For connecting the screens to the list, click on the name of the list.
You will see a “Service UUID” which is a unique key that can connect the user list to the screen(s) through our API.
4. Upload a CSV
The last option is to create a list of users based on a CSV file. A template of the format is available.
After creating the list, you can manage it as a static list (see chapter 2 above), so this means you can adapt it manually.
Create your list
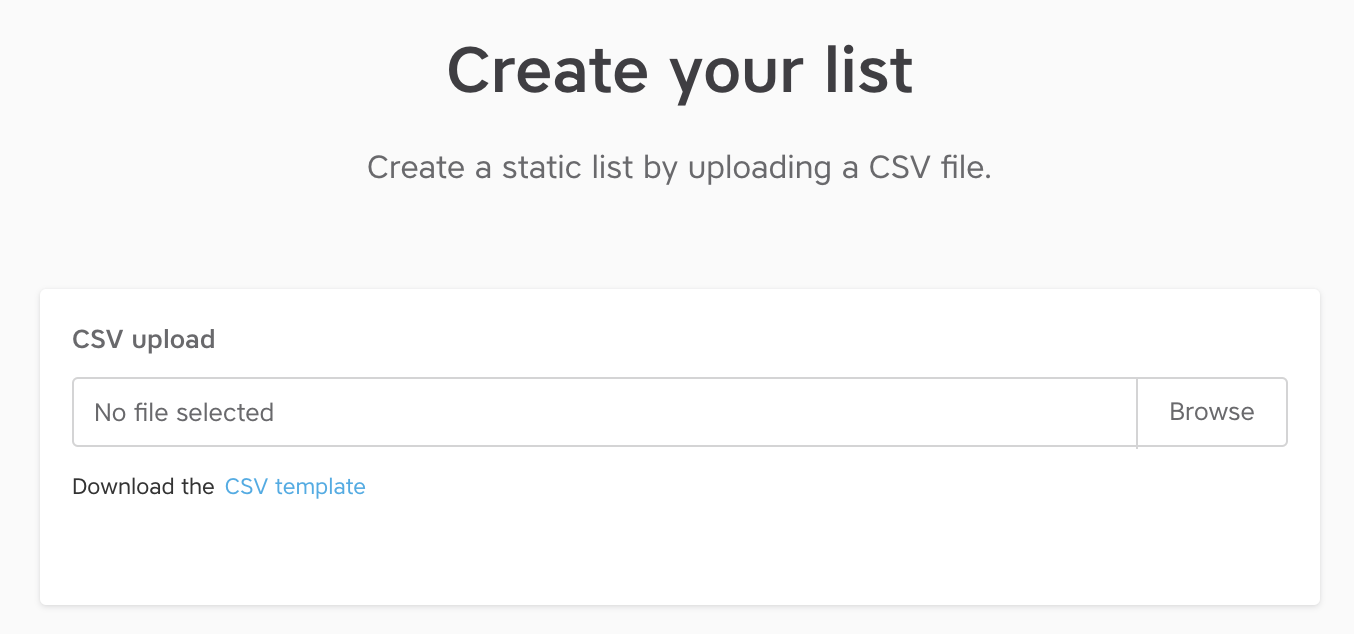
Download the CSV template to see an example of how to create your list.
We need 2 columns in the file:
- identifier: this is the external ID of the user that you want to add to the list.
- source: indicate the common denominator for the members of the list or the name you want to give the list. This column cannot contain any spaces. E.g. “company_event_2023”.
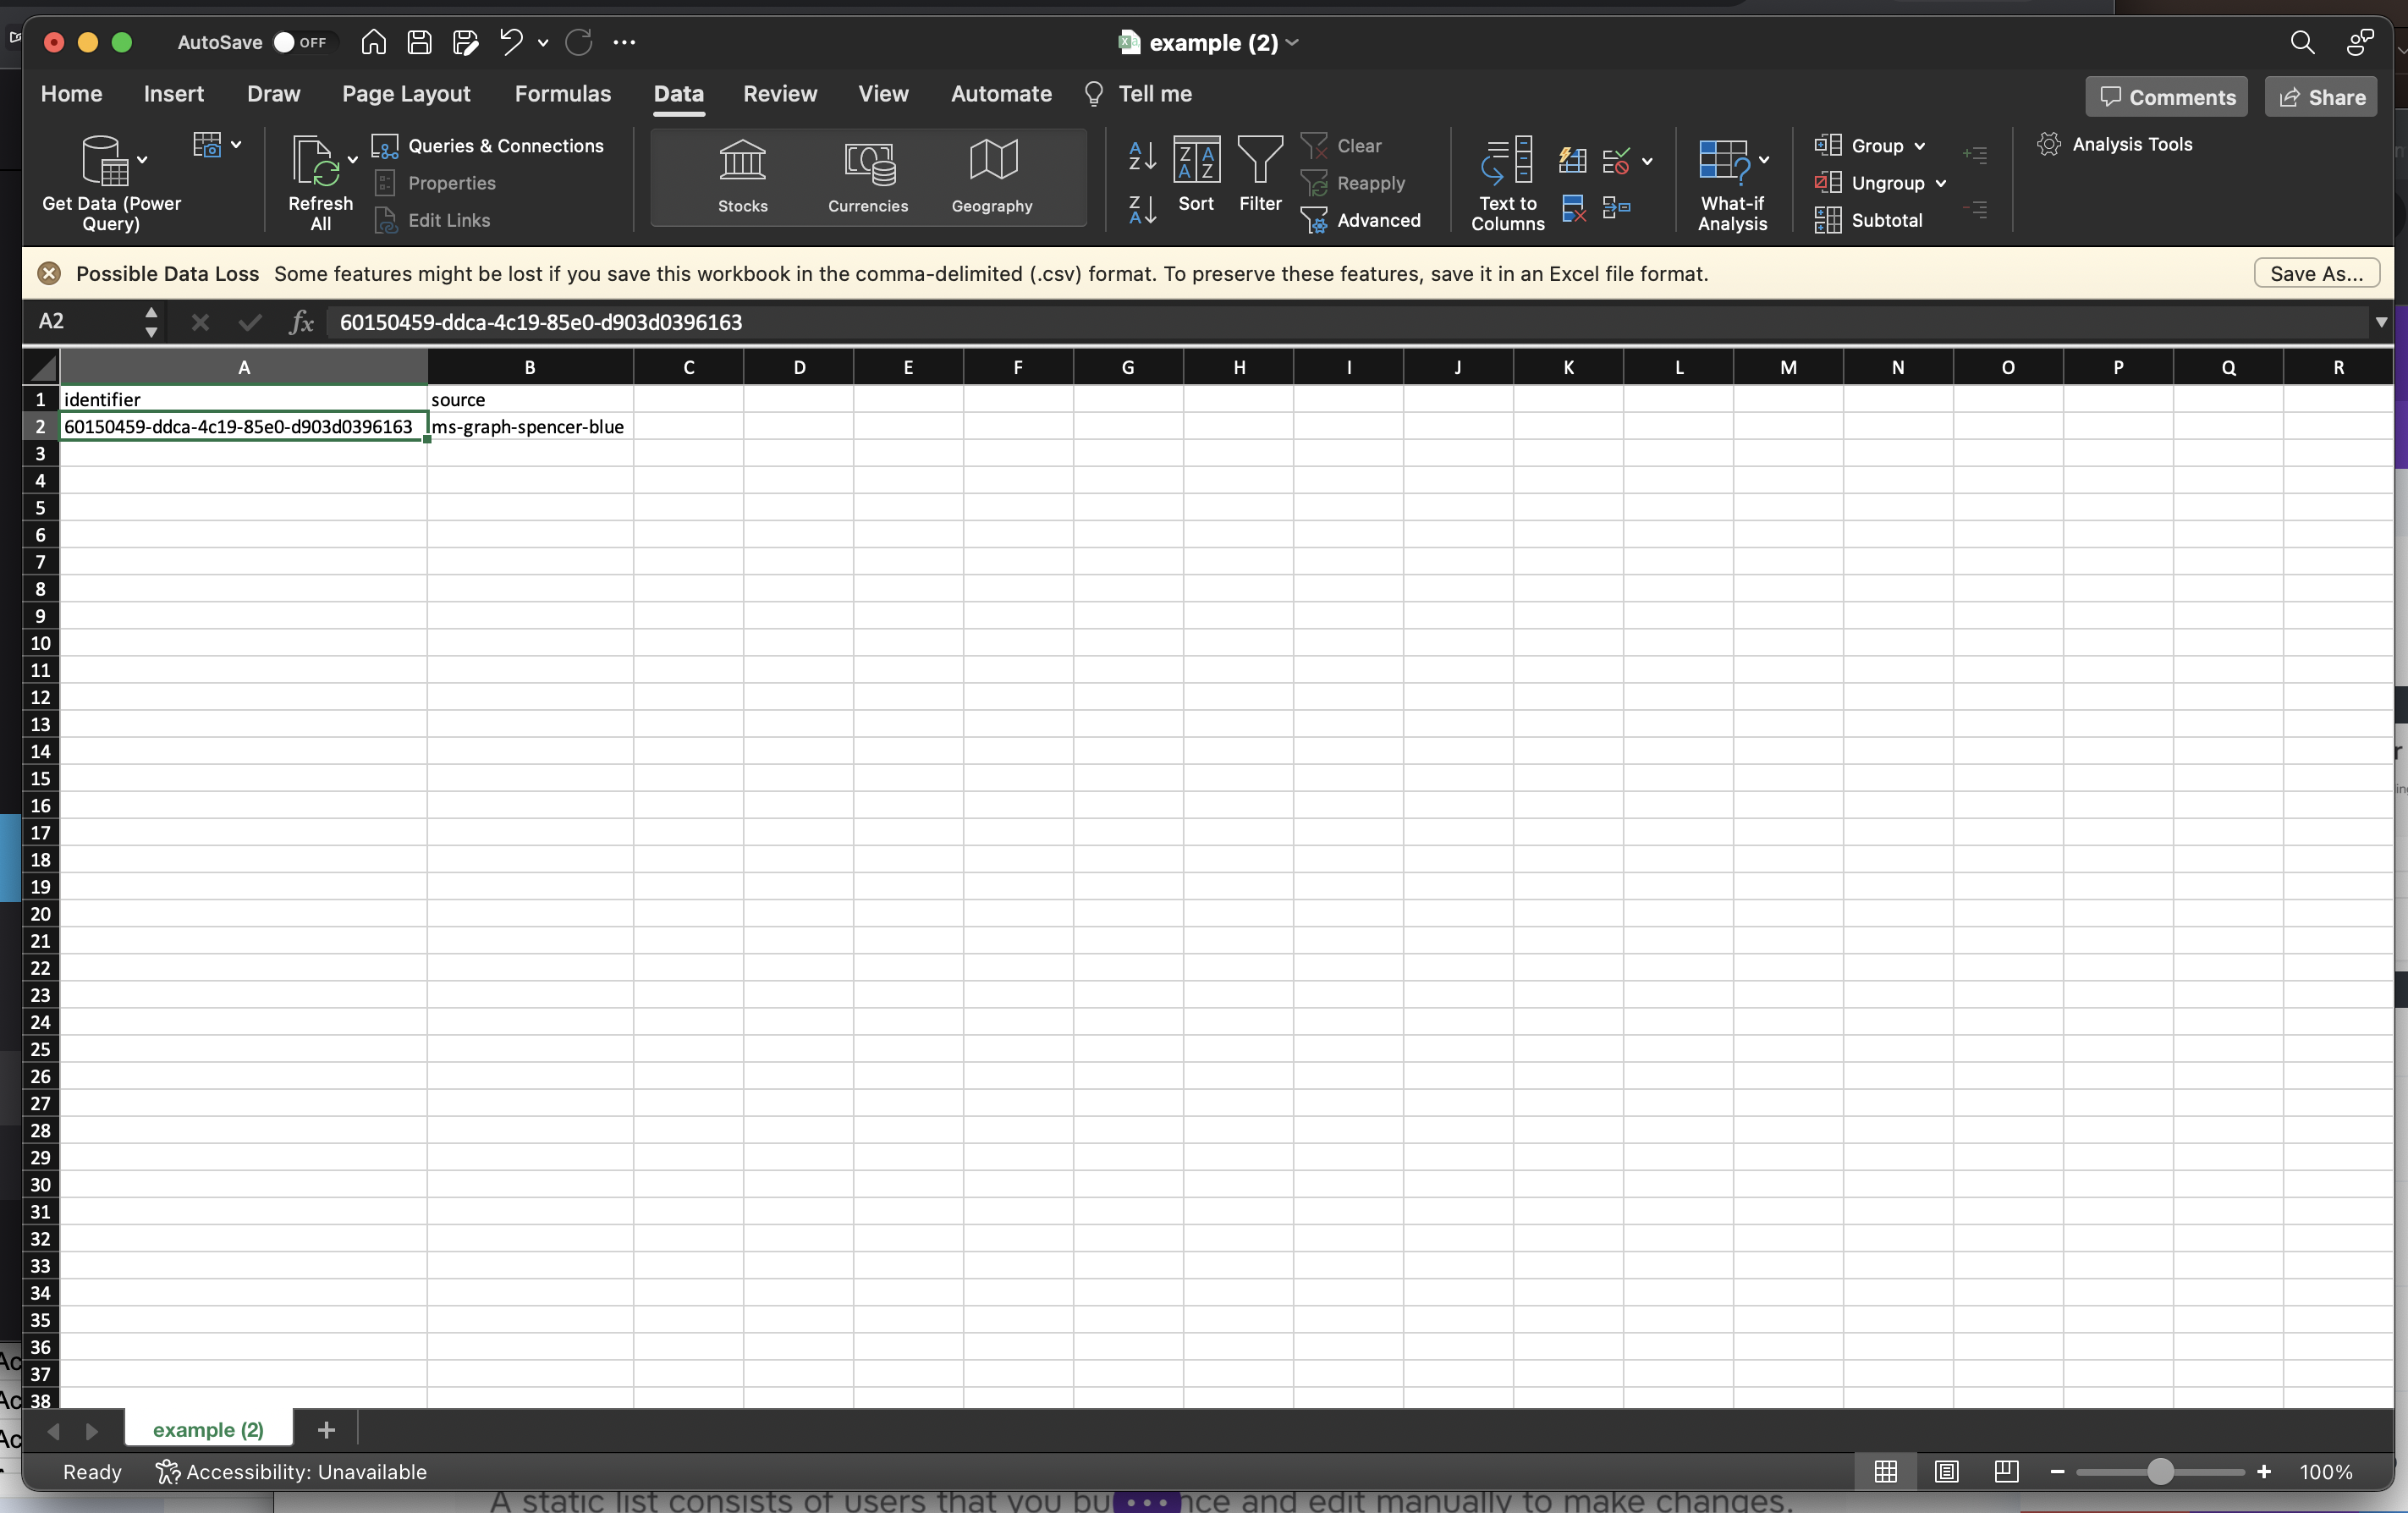
After completing the file, save it in a CSV UTF-8 format.
Depending on the settings in your Excel programme, the separator in the CSV file will be a comma or a semicolon (;). Our system can only work with commas, so you have to check what separator is being used and if necessary to replace it:
- Go to the file in Finder. Right-click on the file name and choose “Open with”.
- Open it with Notepad (for Windows) or TextEdit (for Mac) and check what separator is being used.
- If it is a comma, the file is ready for upload. You can close it and drag and drop it on the page or click “Browse” to add the file.
- If it is a semicolon (;), it is necessary to replace all semicolons with a comma by using the “find and replace” functionality. If you are done, close the file again and drag and drop it on the page or click “Browse” to add the file.
If you have added the file, click “Upload” in the right bottom corner.
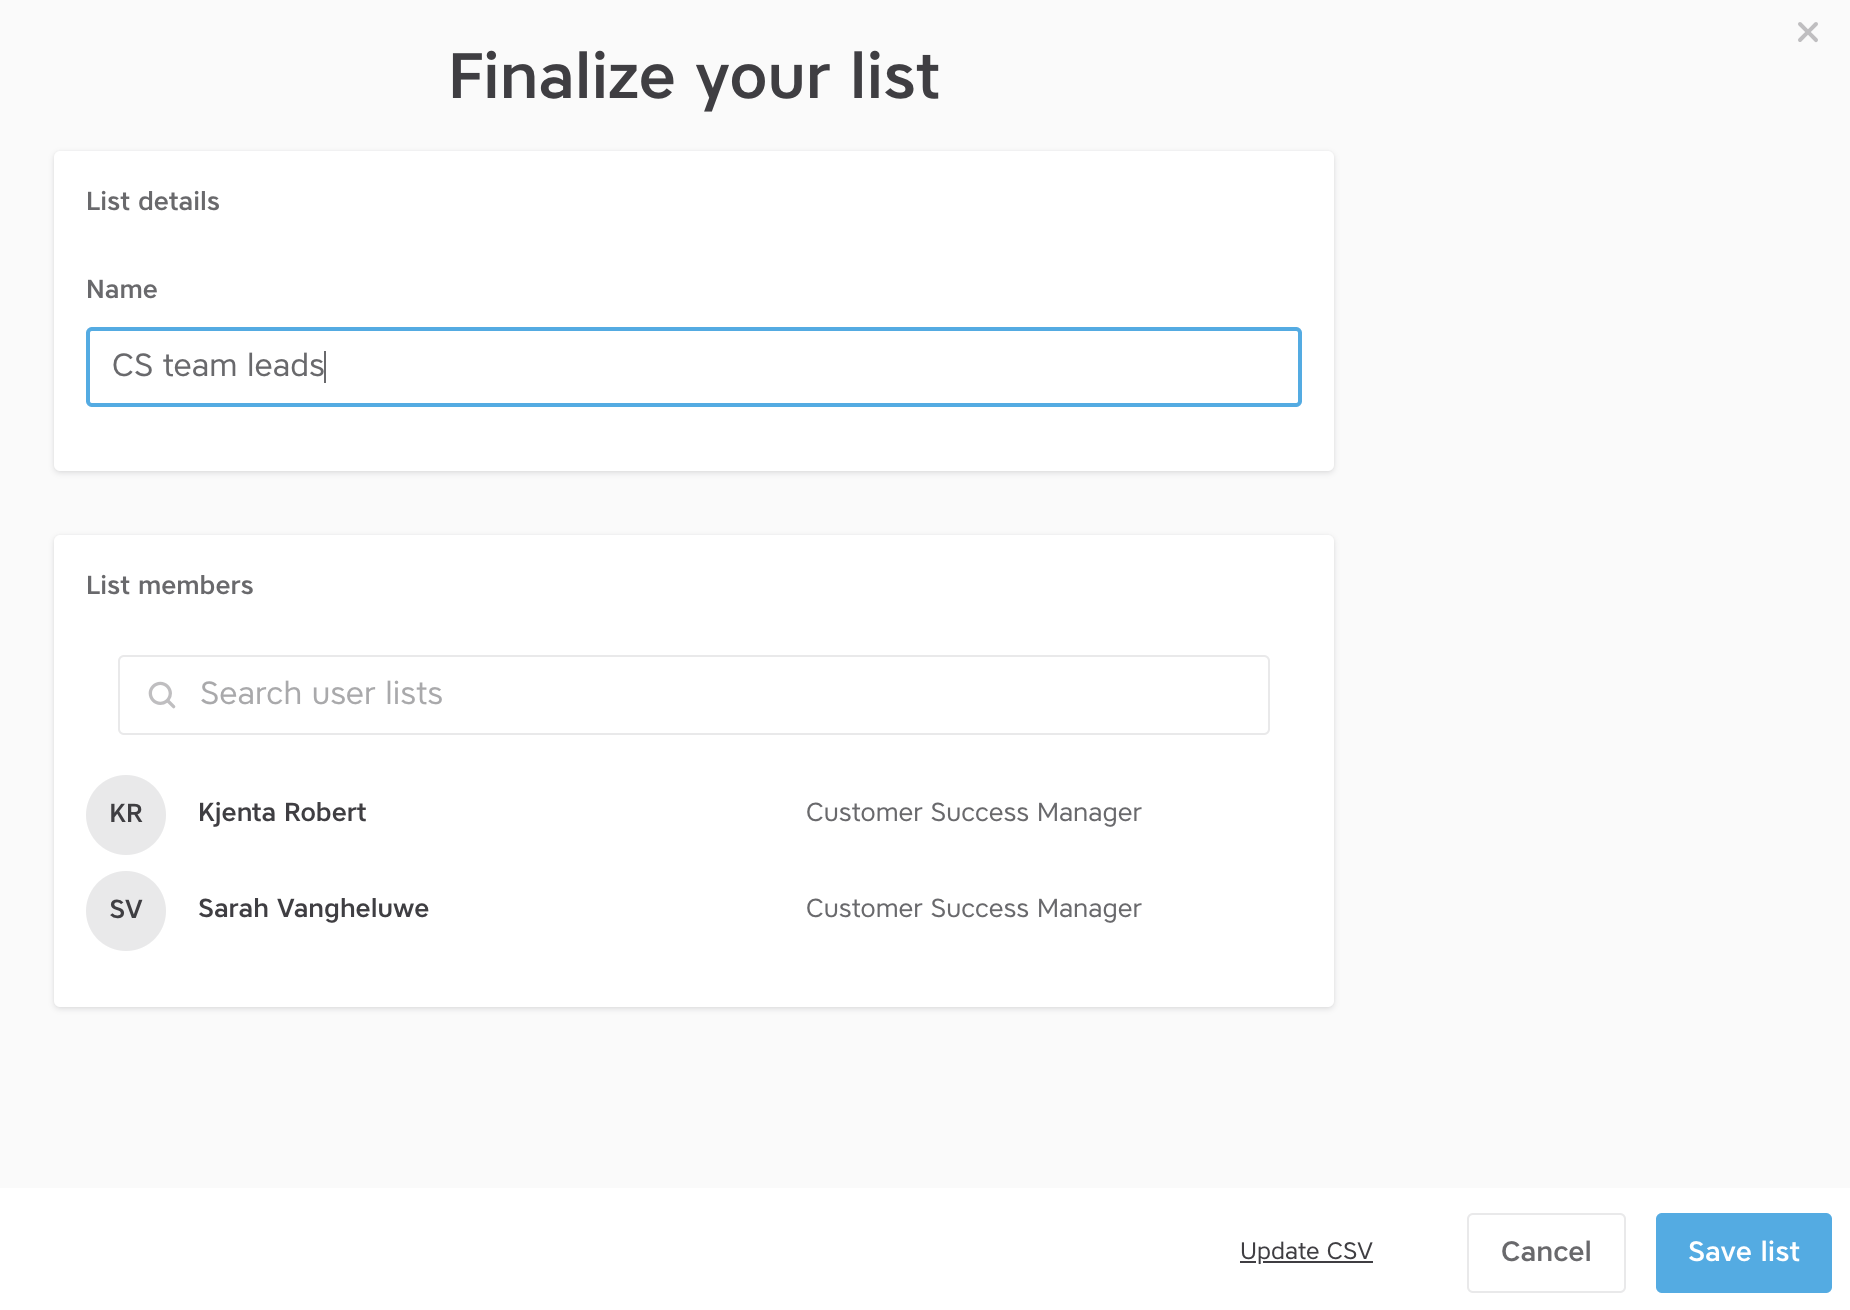
Finalize your list
In this screen, you give your list a name.
Tip! If you plan to create a lot of lists, we advise to keep a fixed structure for the names of the lists to make it user friendly in the future. E.g. country – site – location of the screen, so BE – Waregem – reception area.
You can also see and search all list members.
Finally click “Save list” to save your list.
Update your list
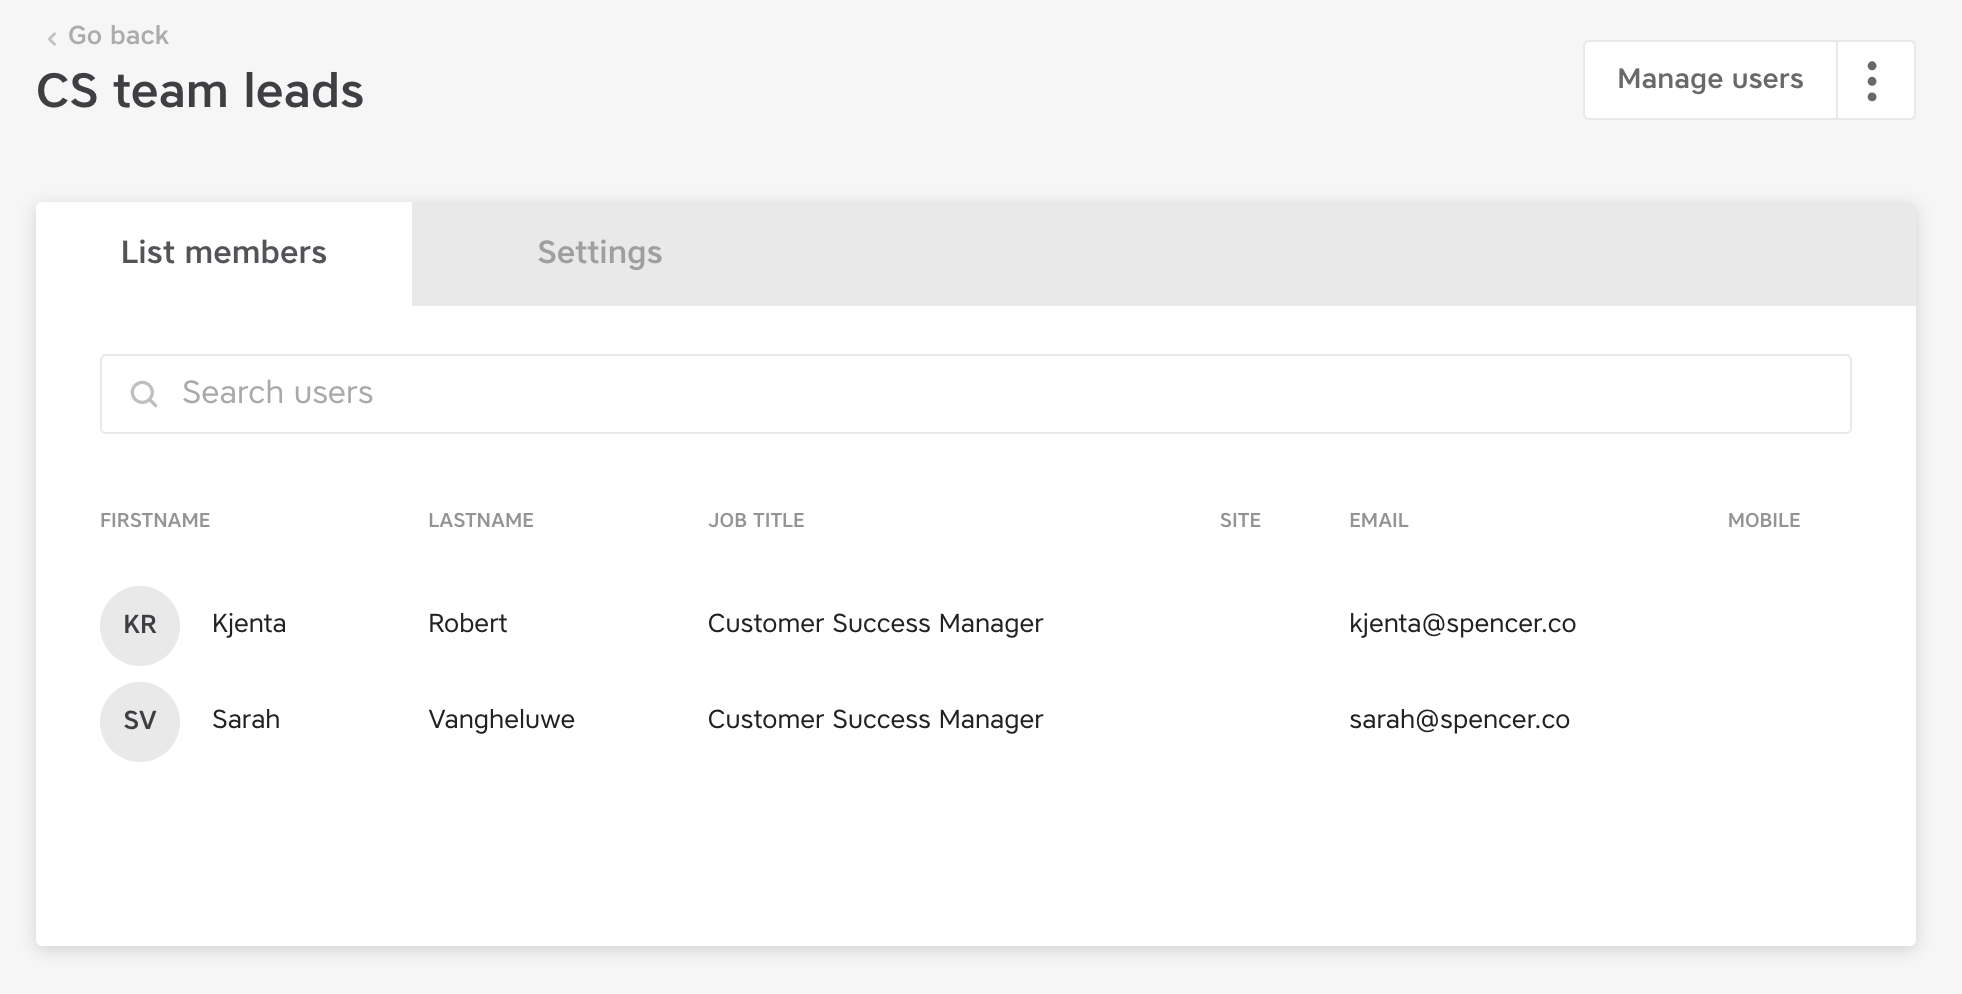
If you need to update this list, go to the overview of user lists and open it.
Click the “Manage users” button in the top right corner.
In the next screen, you can adapt the list like you would do with a static list (see chapter 2 above).
If you have added or removed all necessary users, click “Save list” to save your list.
Any questions?
Our support team is here to make your life easier!