How to create an article
Go in the back office to Publications
There you see an overview of articles. What you see depends on your role:
- If you are a content creator, you will only see your own articles and the ones that other content creators have shared with you to edit.
- If you are a news item admin or a super admin, you see all articles that have been created by all users with back office rights to create articles. You are able to add, remove, edit news articles, your own but also the ones that others created.
By default your publications are filtered on your own created content. Especially as a superadmin this can be easier to see your own publications first. You can remove your name to see all publications of course.
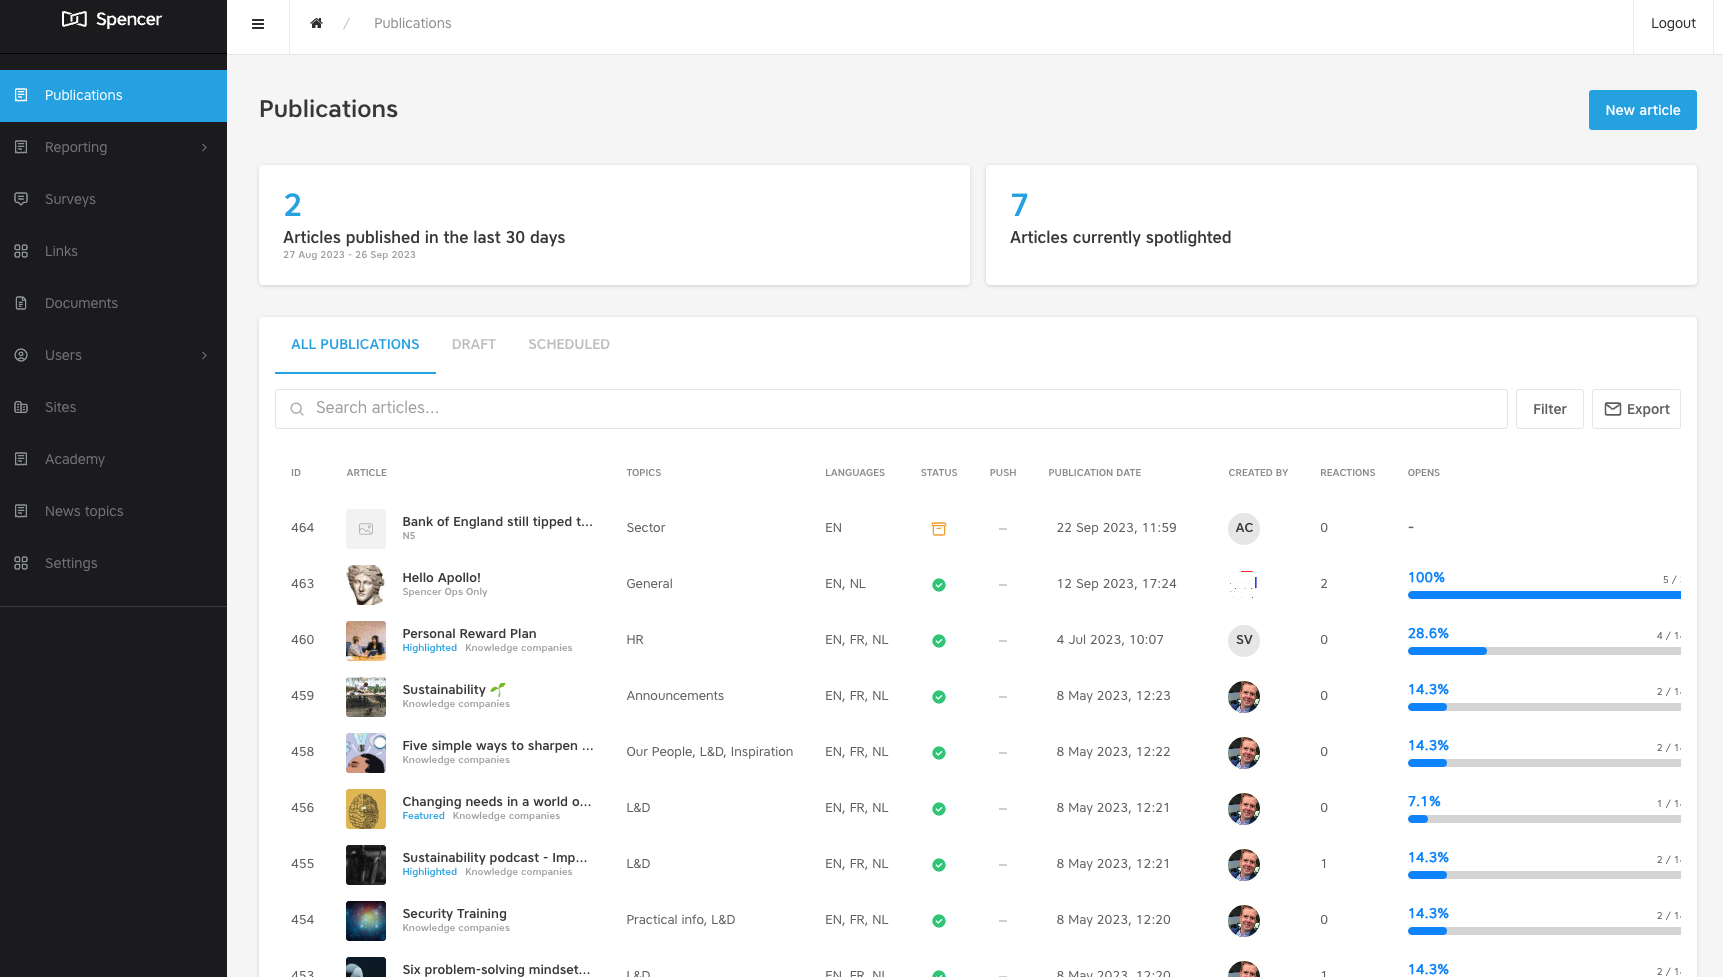
You can now easily switch via the tabs at the top between drafts and scheduled items for quick reference.
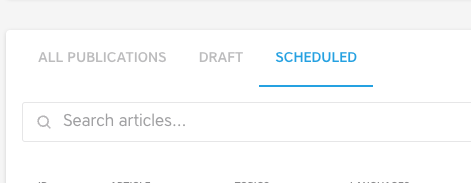
What else do you see in this overview?
- Thumbnail of the header image
- Title of the article
- Audience that was selected for the article: Everyone in the organization or a specific user list
- The topic(s) related to the article
- The language(s) in which it is published
- The status: a green check mark means published, an orange clock icon means scheduled to be published at a later moment, a brown box icon means it is archived, a grey pencil icon means it is a draft article.
- Whether or not the article features a native video (uploaded directly within the platform)
- Whether or not a push notification was sent out when the article was published
- The author of the article
- When the article was created
To create an article, you click on the button « New article » in the top right corner. You see a pop-up window that gives you 3 choices.
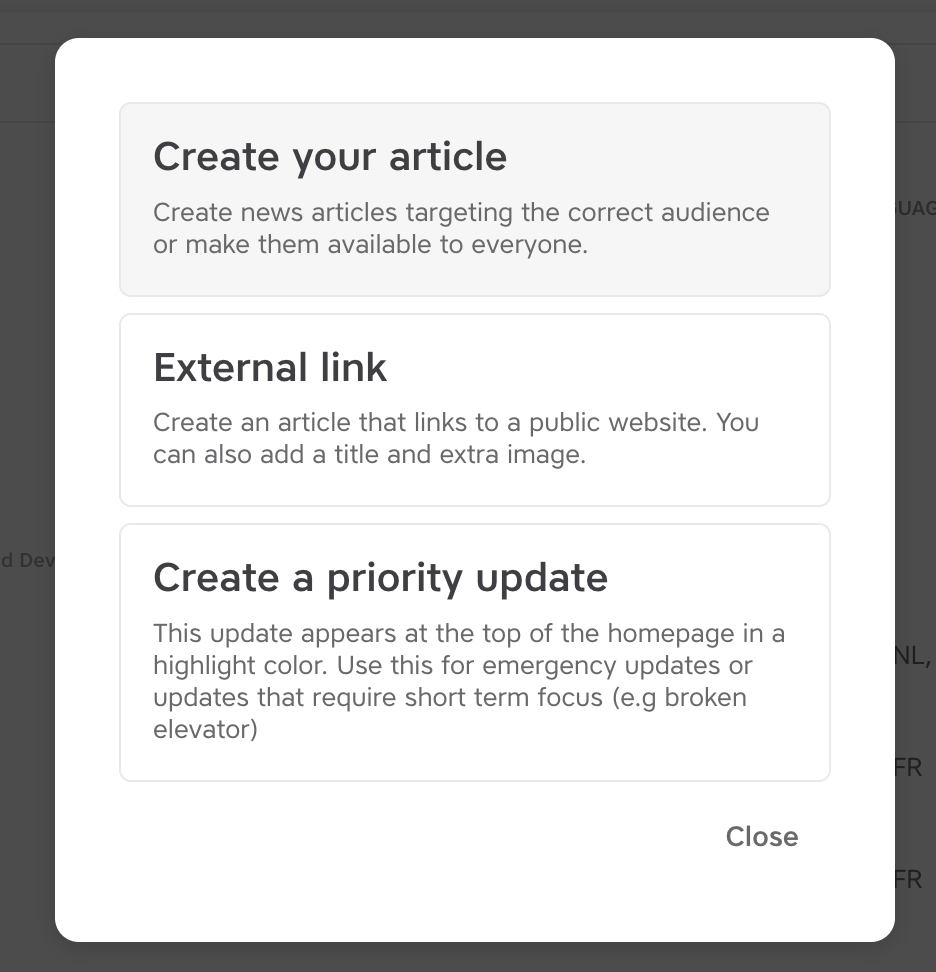
Below, we will go into detail about each of the 3 options.
1. Create your article
With this option, you can create an article from scratch. For publishing it, you have to fill in 4 tabs. Below we go in to detail about them.
Good to know: you cannot publish an article when not all mandatory fields are completed, in that case the Publish button remains grey and unclickable. Once all mandatory fields are completed, the button becomes blue and clickable, so you can publish the article.
Details tab
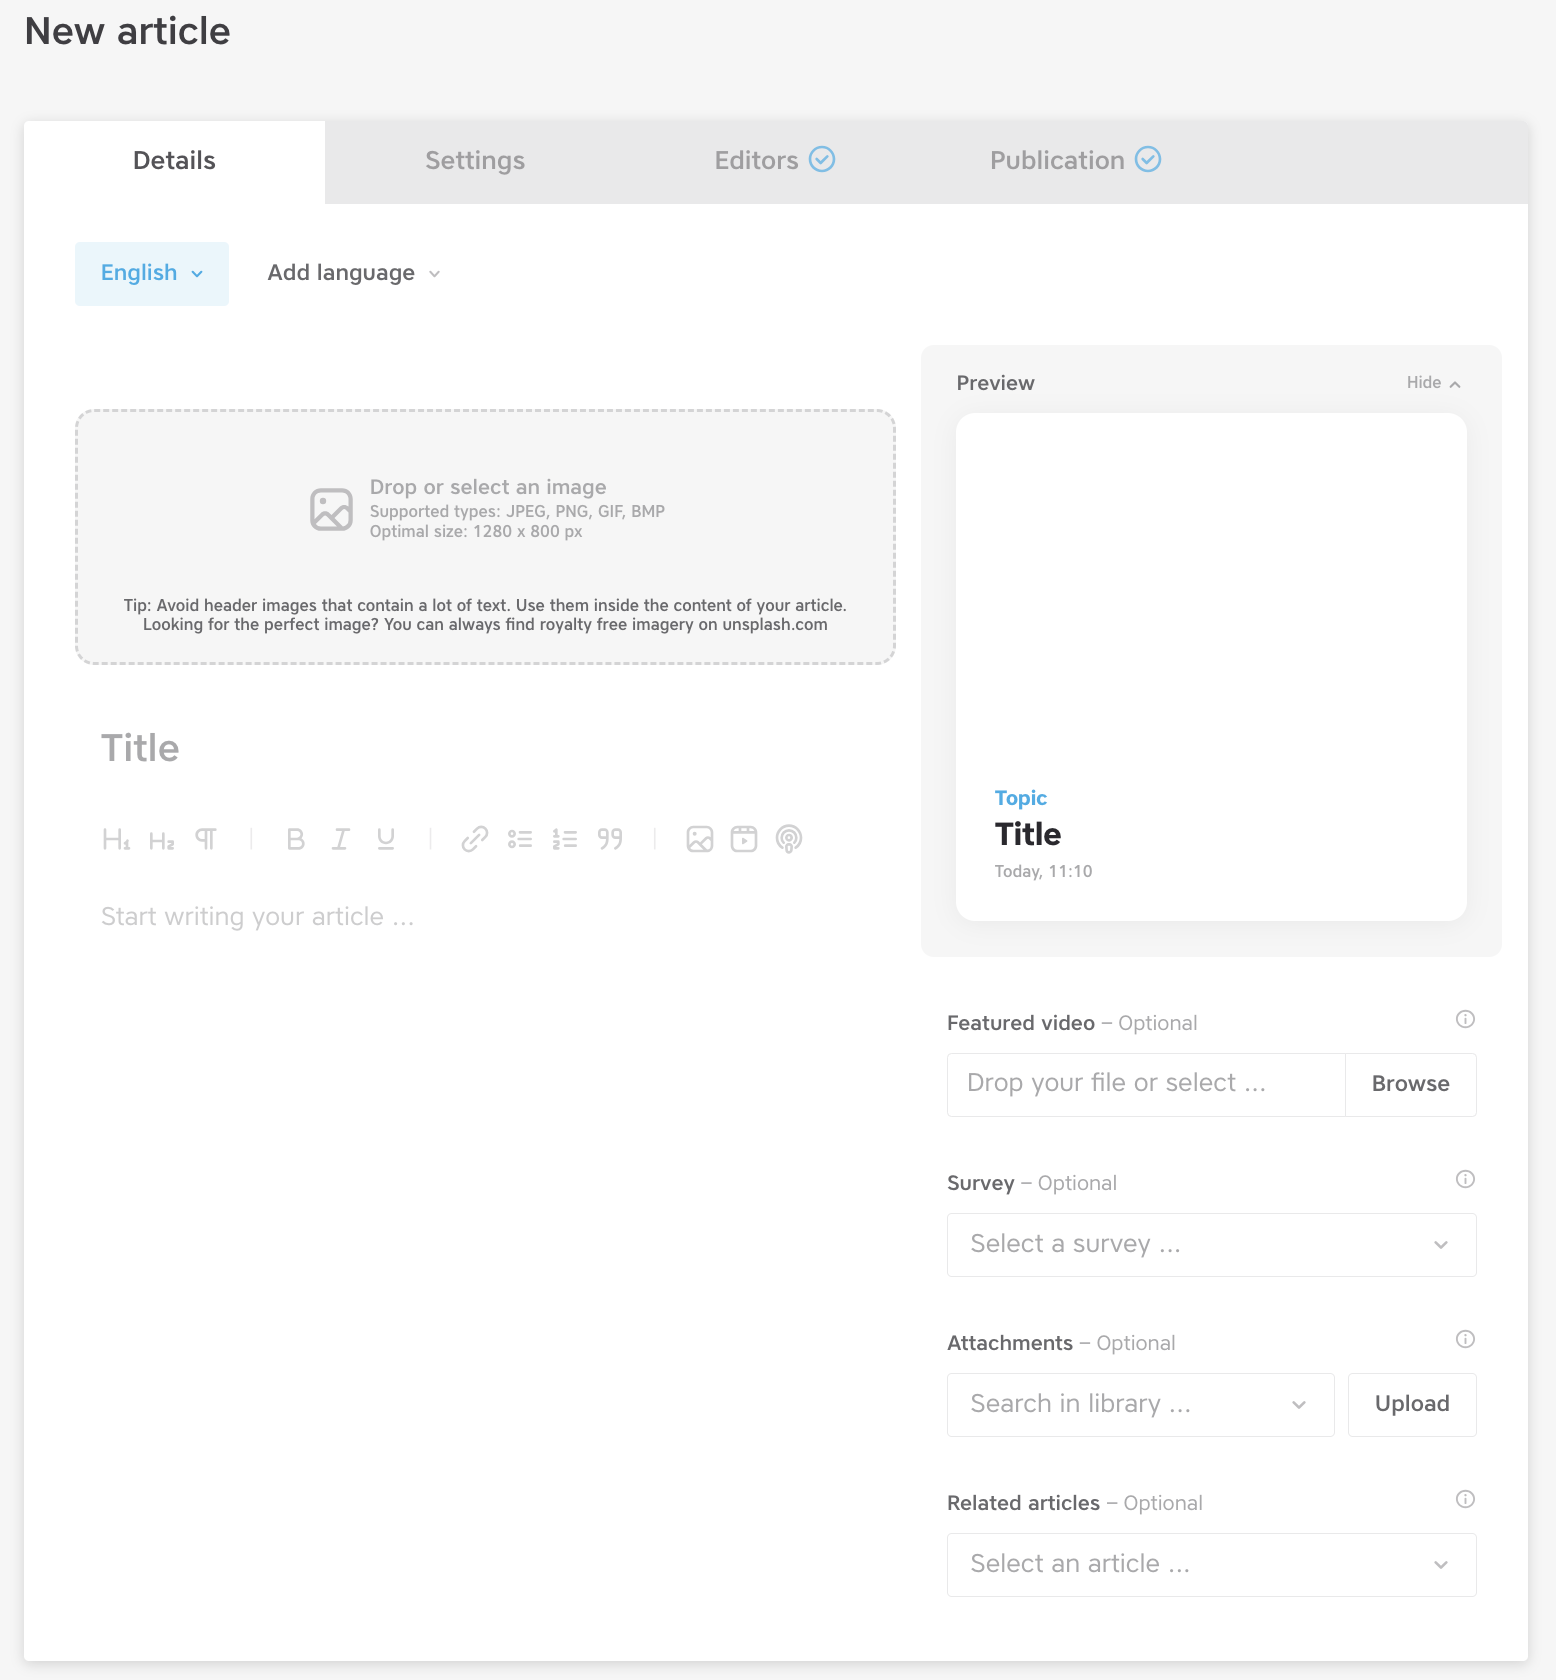
The Details tab is where you create the content of the article.
The first thing to do when you create an article is to check if the language settings are correct. Click the button with the default language (often English or Dutch) and you will see a dropdown menu which shows all languages in which your app is available. Click on the language in which you are going to write the article.
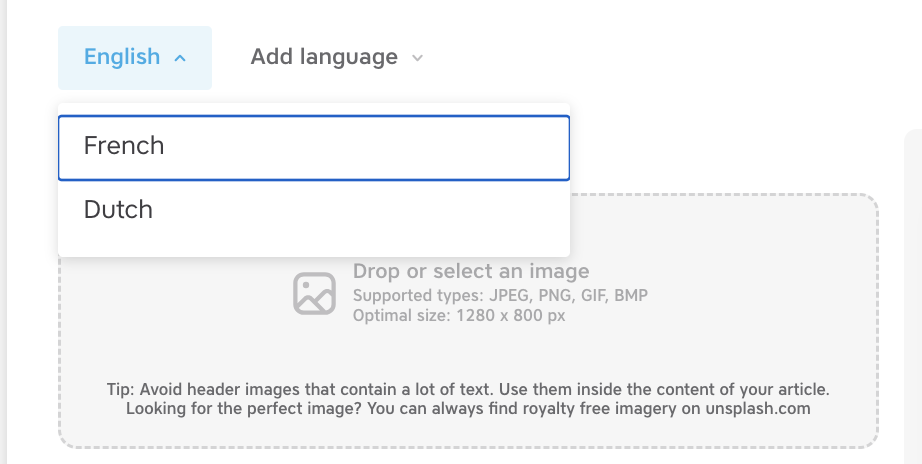
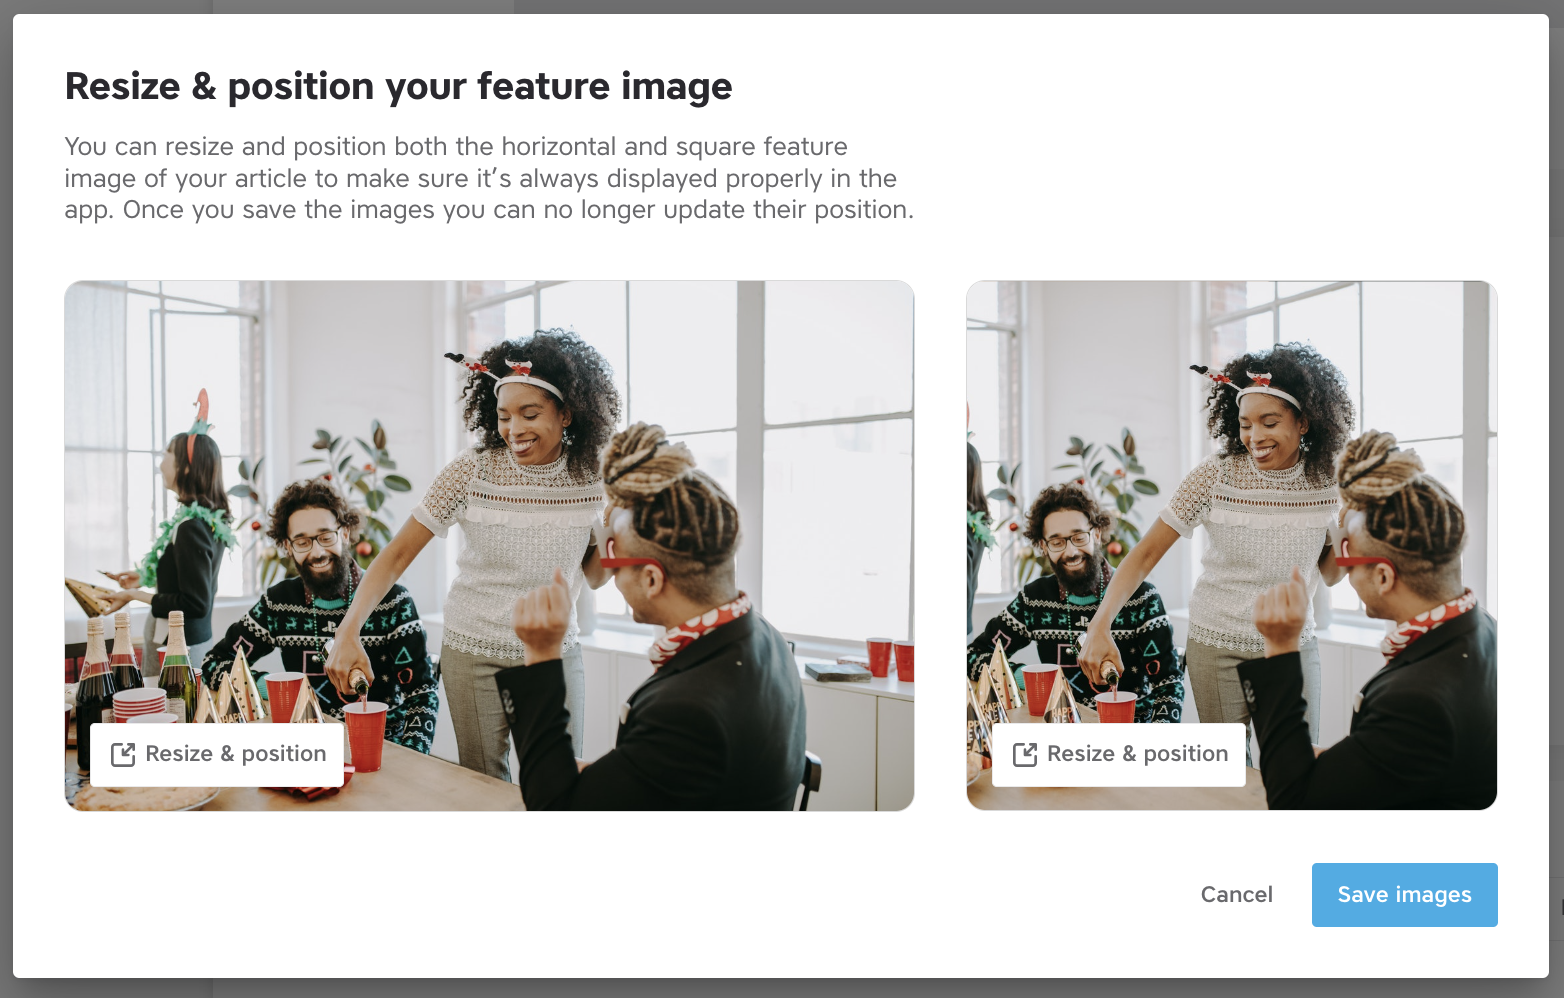
Add a header image by dropping an image in the designated field or selecting a file from your computer.
A pop-up window will appear where you can resize and position the image for both the newsfeed preview and for the view when you open the article.
Check out our best practices for adding images to your articles.
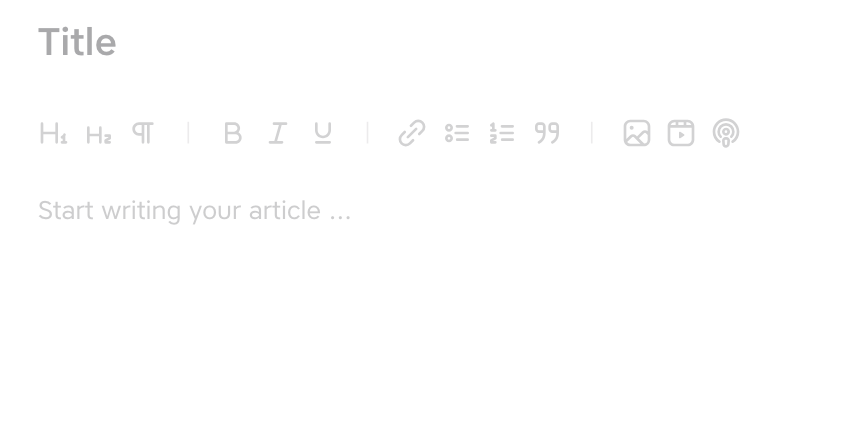
Create the content of your article.
A title is mandatory, just like some sentences in the body copy.
The content editor has these options:
- H1 & H2: for adding paragraph titles in the article.
- B, I and U: make some of the text bold, italic or underlined.
- Link button: add an external link to a webpage or an internal link to content within the platform (other articles, surveys, documents, forms or menu items).
- Lists: make them with bullet points or numbers.
- Quotation marks: use this for highlighting a quote or the key message in the article.
- Image: add an inline image in the article. Check out our best practices for adding images to your articles.
- Video embed: fill in the URL of your YouTube or Vimeo video to embed it in the article. Check out our manual for sharing videos with your articles.
- Podcast embed: fill in the URL of your podcast to embed it in the article. Read this client case about communicating internally with podcasts.
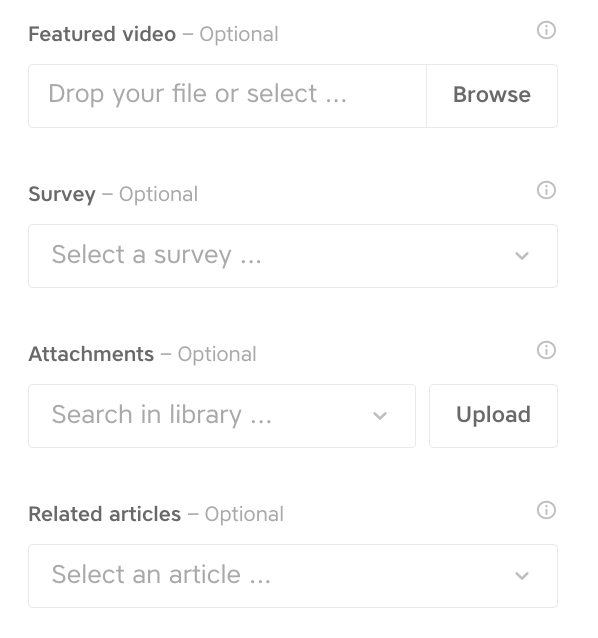
Enrich your article with these options:
- Featured video: add a video from your computer to the article. Check out our manual for sharing videos with your articles.
- Surveys: add a survey to the article. The link to the survey will appear at the bottom of the article.
- Attachments: add a related document to the article. You can either search in the document library or upload a document directly. The link to the document will appear at the bottom of the article.
- Related articles: add a (few) related article from the news archive to the article. The link to the related article will appear at the bottom of the article.
Auto-translate your article:
- Now you have created the article, you can use the auto-translate feature to make it available in other languages within seconds.
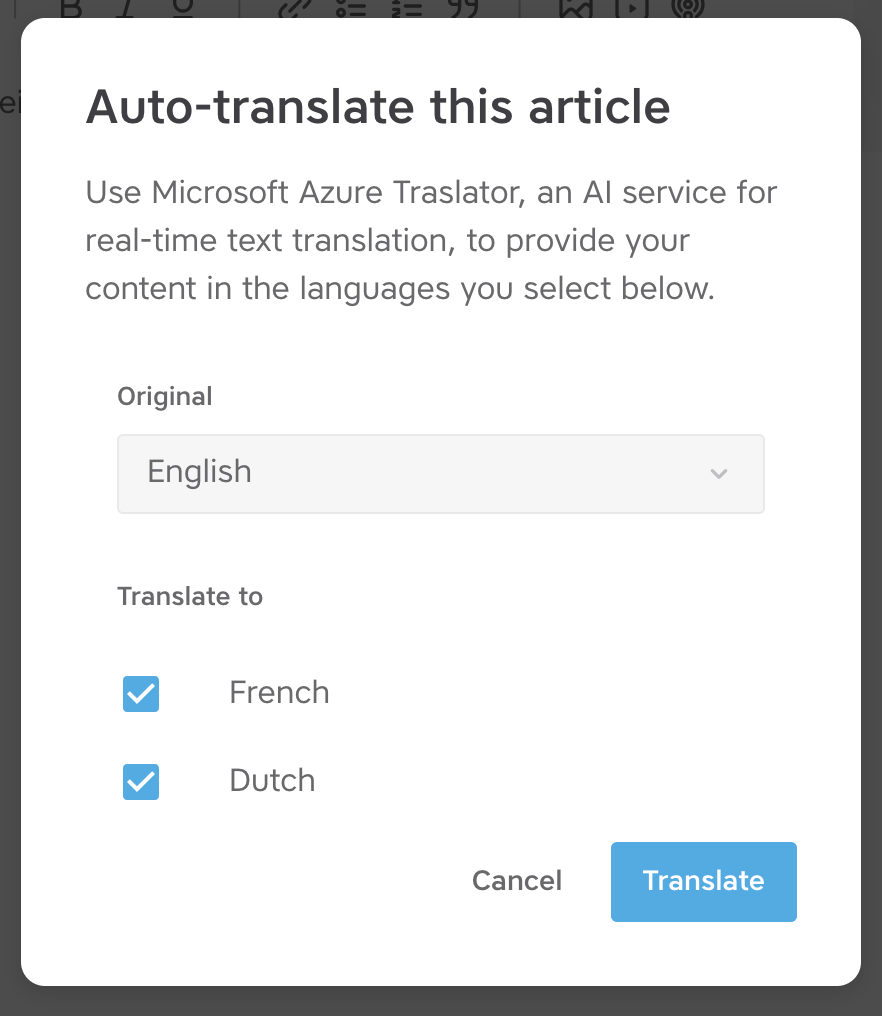
- Click the Auto-translate button in the left bottom corner and a pop-up window will appear where you can select the original version and the languages that you want to translate the article into.
- After clicking the Translate button, within seconds you will see different language buttons on top of the article.
- You can click these to check the different versions and adapt them if necessary. You can adapt:
- The content of the article
- The header image
- The optional content to enrich your article in the right column.
Settings tab
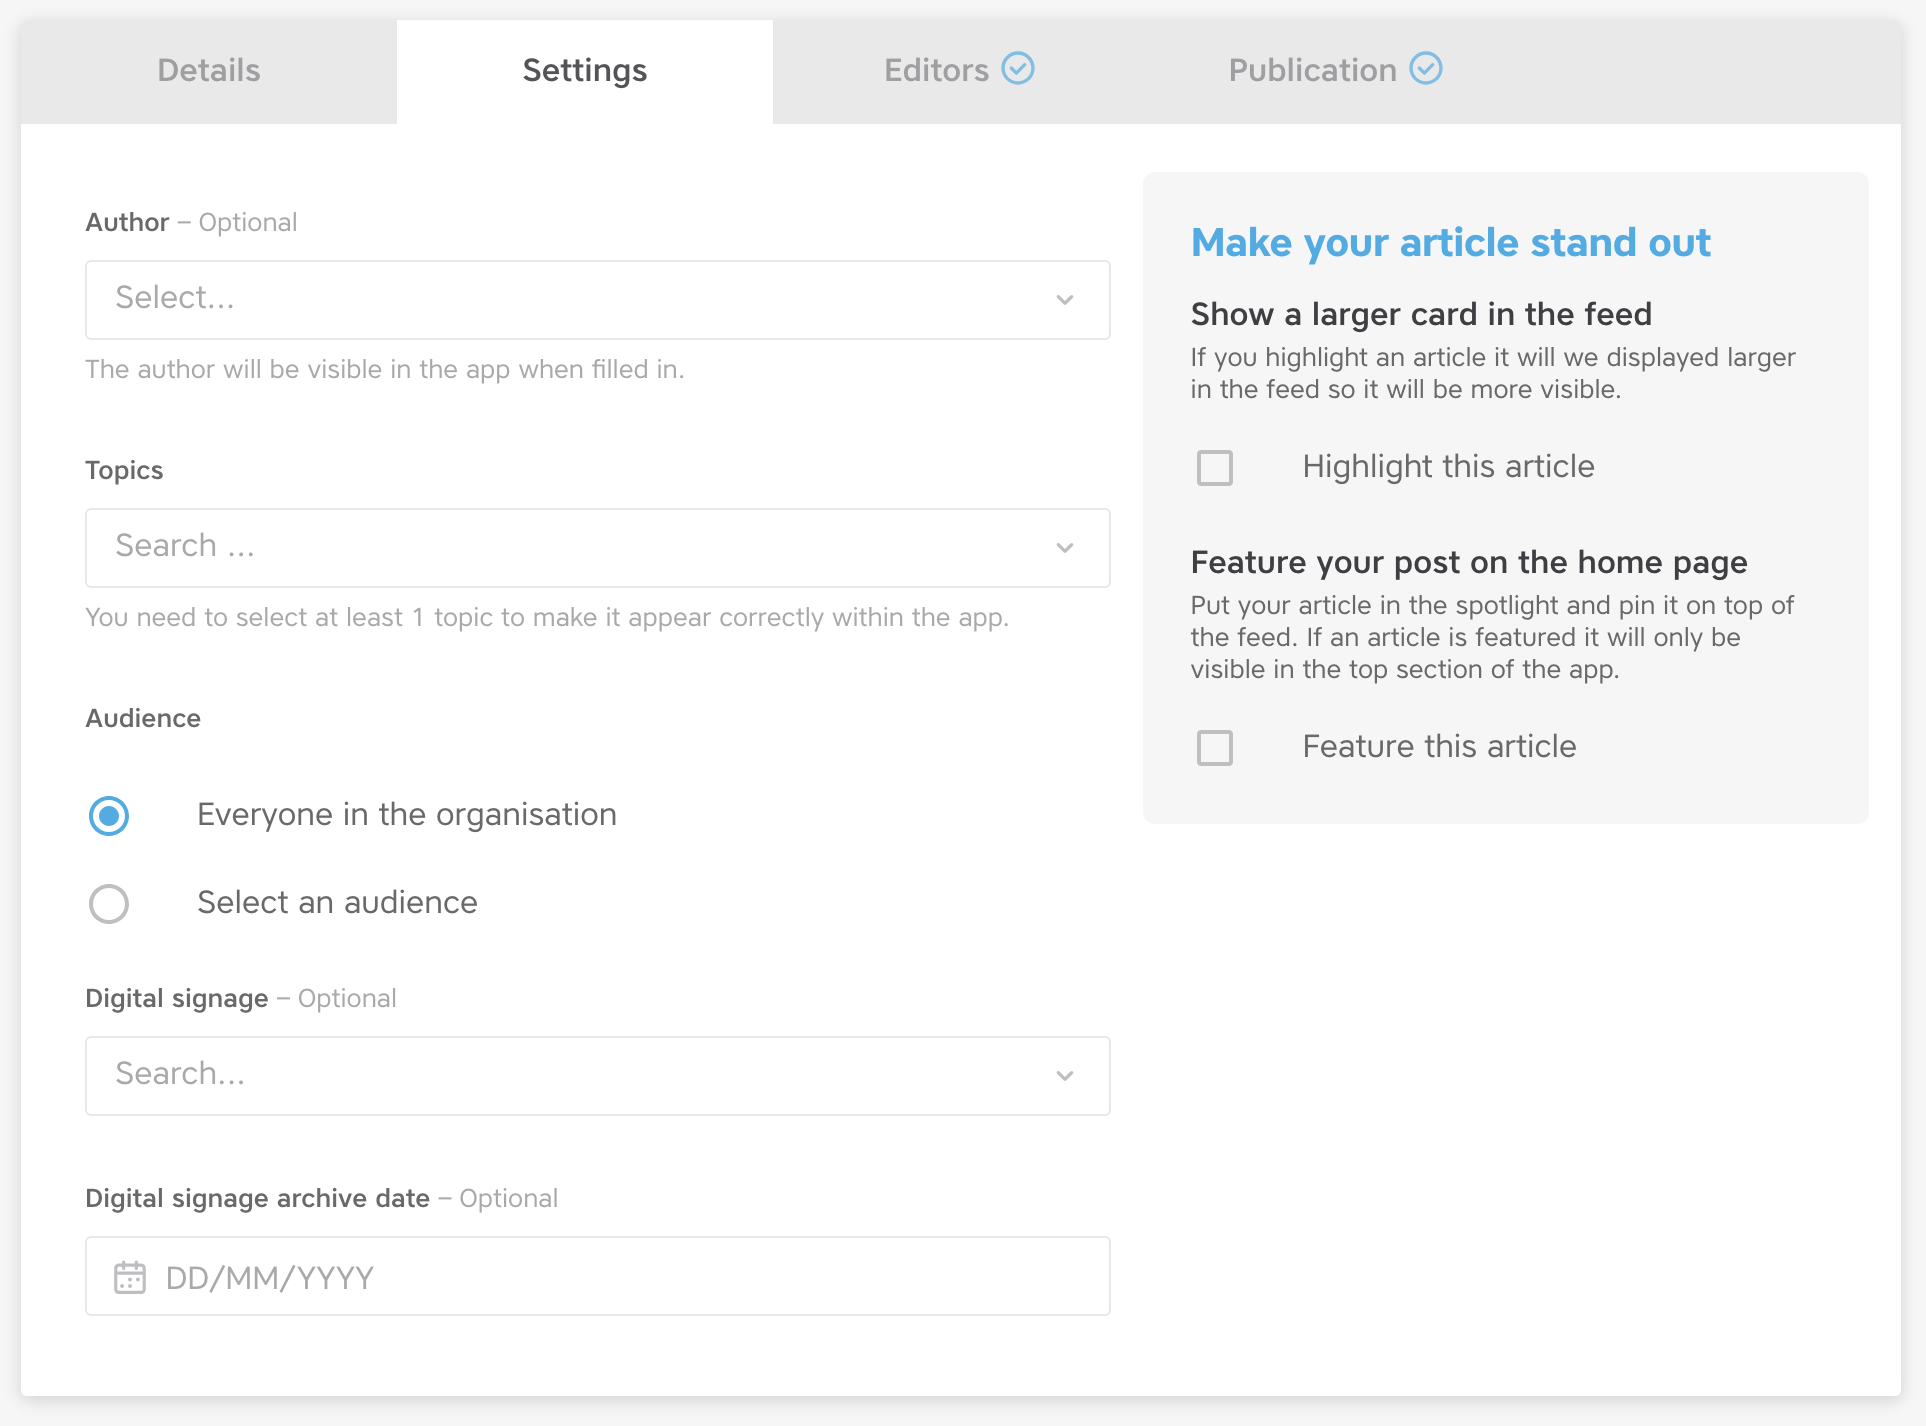
In this tab, you get to select a few settings for your article:
- The author of the article (optional): if you are a content creator, selecting your name will make a message appear at the bottom of the article that says « written by (your name) ». If you are a super admin, you can select any user of the app as the author.
- The topic related to the article (mandatory): you have to select at least one topic.
- Audience (mandatory): select the target audience for your article, either « Everyone in the organization » or a specific audience.
- Digital signage (optional): if your Spencer app is linked to your digital signage system, you can select on what (group of) screen(s) you want the article to appear. And you can choose a separate archive date for the publication on the screens.
- Make your article stand out (optional): select one or both of these feature to create a more dynamic newsfeed. If you choose to feature the article, you can select an expiry date, after which the article will appear in the regular newsfeed. Check our best practice article to play these features to their strengths.
Editors tab
In this tab, you can grant other content creators full editing access to your article. E.g. for validation of the article or the translation.
Please note that if you save the article as a draft instead of publishing it, as the original content creator you are still the only person who can publish the article.

Publication tab
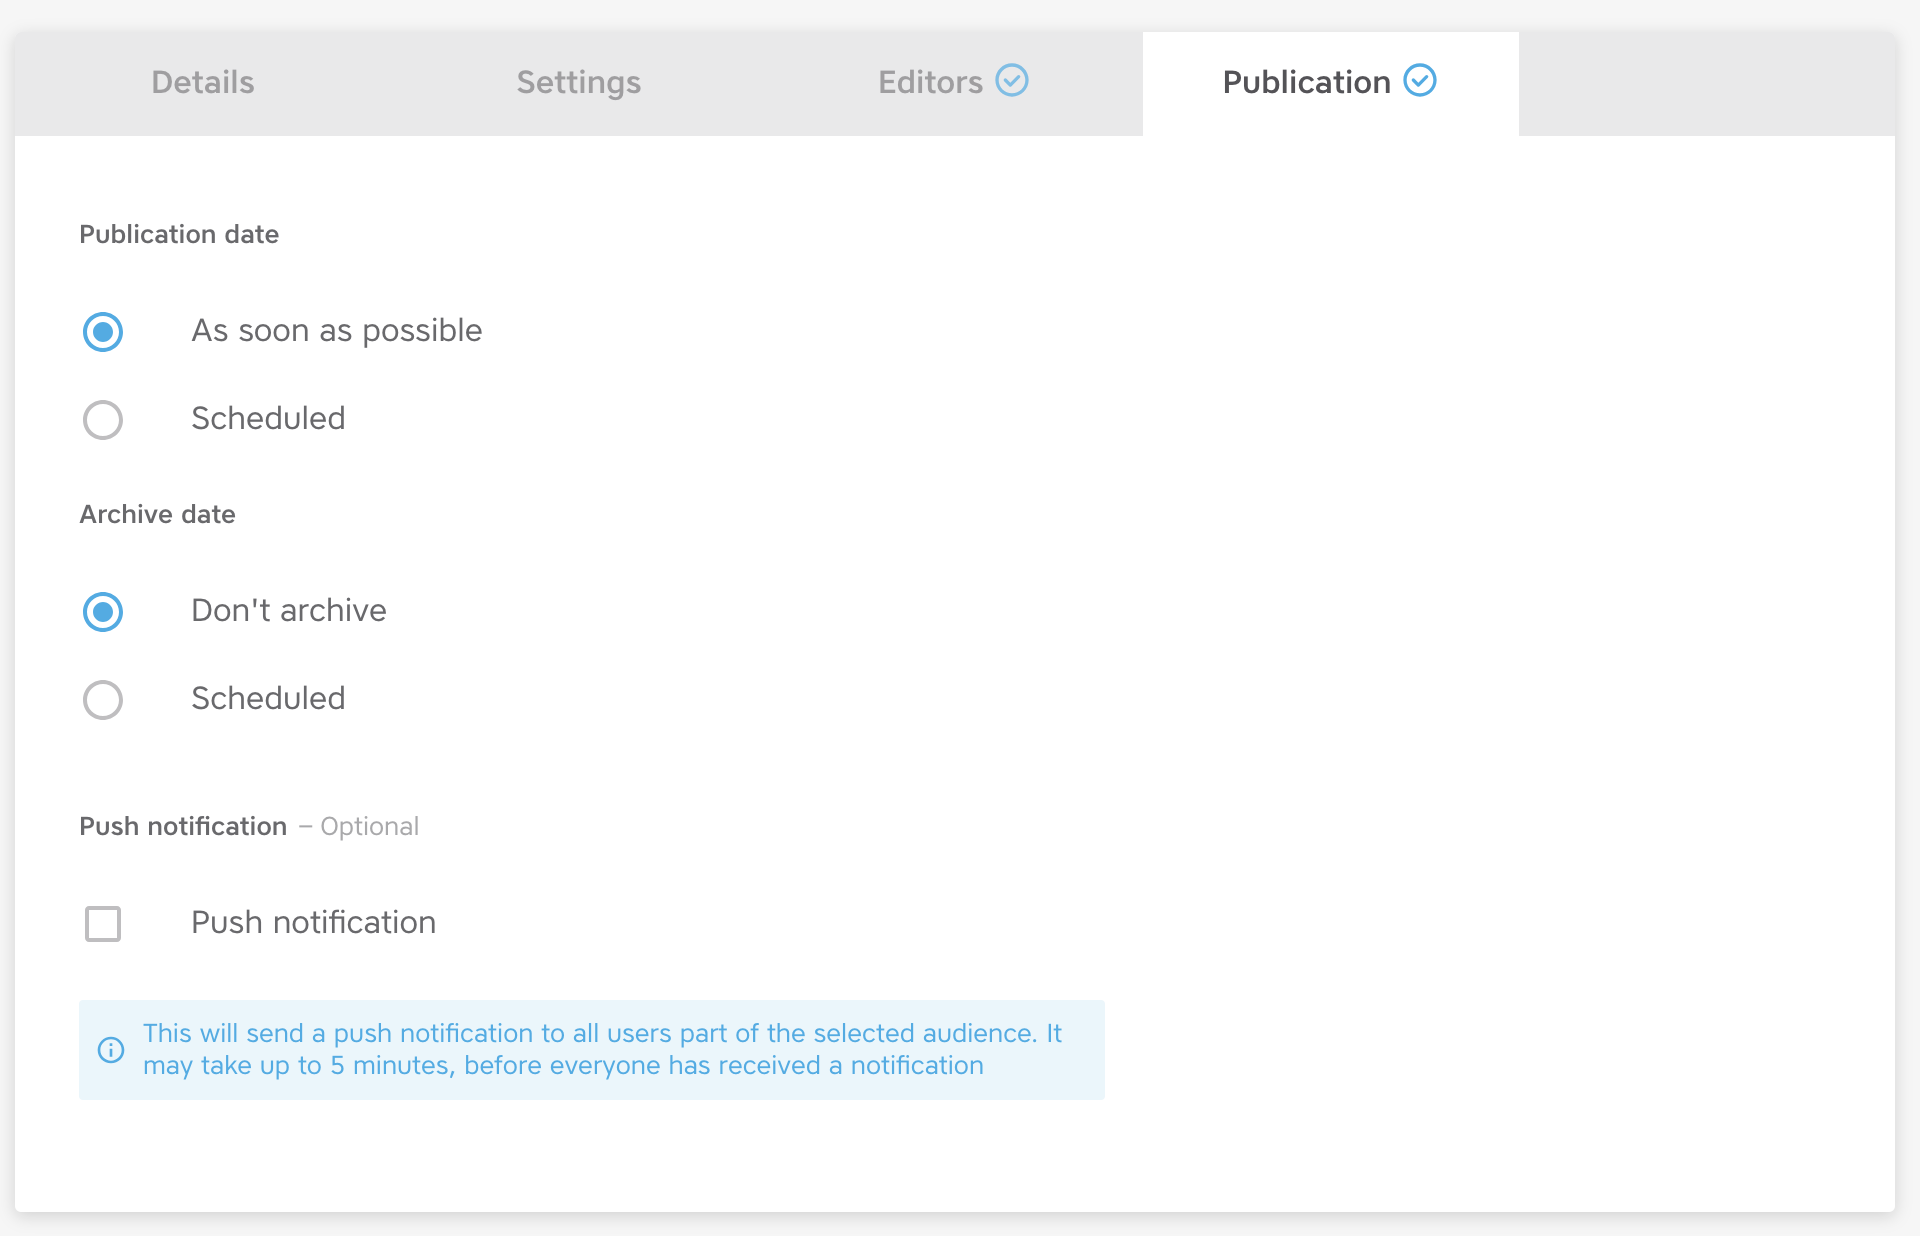
In this tab, you select a few options related to publishing your article:
- Publication date: either « As soon as possible » or on a moment in the future
- Archive date: if this article is no longer newsworthy after a certain date, you can select an archive date. The article will then no longer be visible in the app, but it remains accessible in the back office.
- Push notification: select whether or not you want to notify your users of the publication with a push notification.
Publishing your article
If you have completed all mandatory fields, you can publish your article. The Publish button in the bottom right corner becomes blue and clickable. If not, the Publish button remains grey and unclickable.
Not sure what mandatory field you have missed? Check the tabs on top. If all mandatory fields are completed, you will see a blue check mark appear. In the case below, there is still a mandatory field to complete on the Settings tab.

After publishing your article
After the publication of your article, you will see another tab « Report » appear when you open the article. There, 24 hours after the publication, you will find some insights about the reach and readership of the article.
Other options you have after publication:
- You can adapt the article and update it. Go to the related tab, change what you want to adapt and click the Update button in the bottom right corner. Please note that users will not be notified of this change by push notification unless you deliberately select this option again.
- Archive the article immediately by clicking the Archive button.
- Share the article via email or a text message with the share link that is generated when you click the Share button. Please note that the article will remain only visible for users of the app, not for any third parties without access to the app.
- Duplicate the article: need to publish a very similar article? Duplicate it and work on a copy of this article to avoid any duplicate work.
- Delete the article. This will remove the article from both the app and the back office.

2. Create an article with an external link
Creating an article based on an external link allows you to easily share news from external sources with your colleagues. For example:
- an article about the company in the press
- a job opening on your public job site
This type of article generates a title and visual in the newsfeed like a regular article, but when you click it, you are redirected automatically to the external webpage.
For publishing it, you have to fill in 3 tabs. Below we go in to detail about them.
Good to know: you cannot publish an article when not all mandatory fields are completed, in that case the Publish button remains grey and unclickable. Once all mandatory fields are completed, the button becomes blue and clickable, so you can publish the article.
Details tab
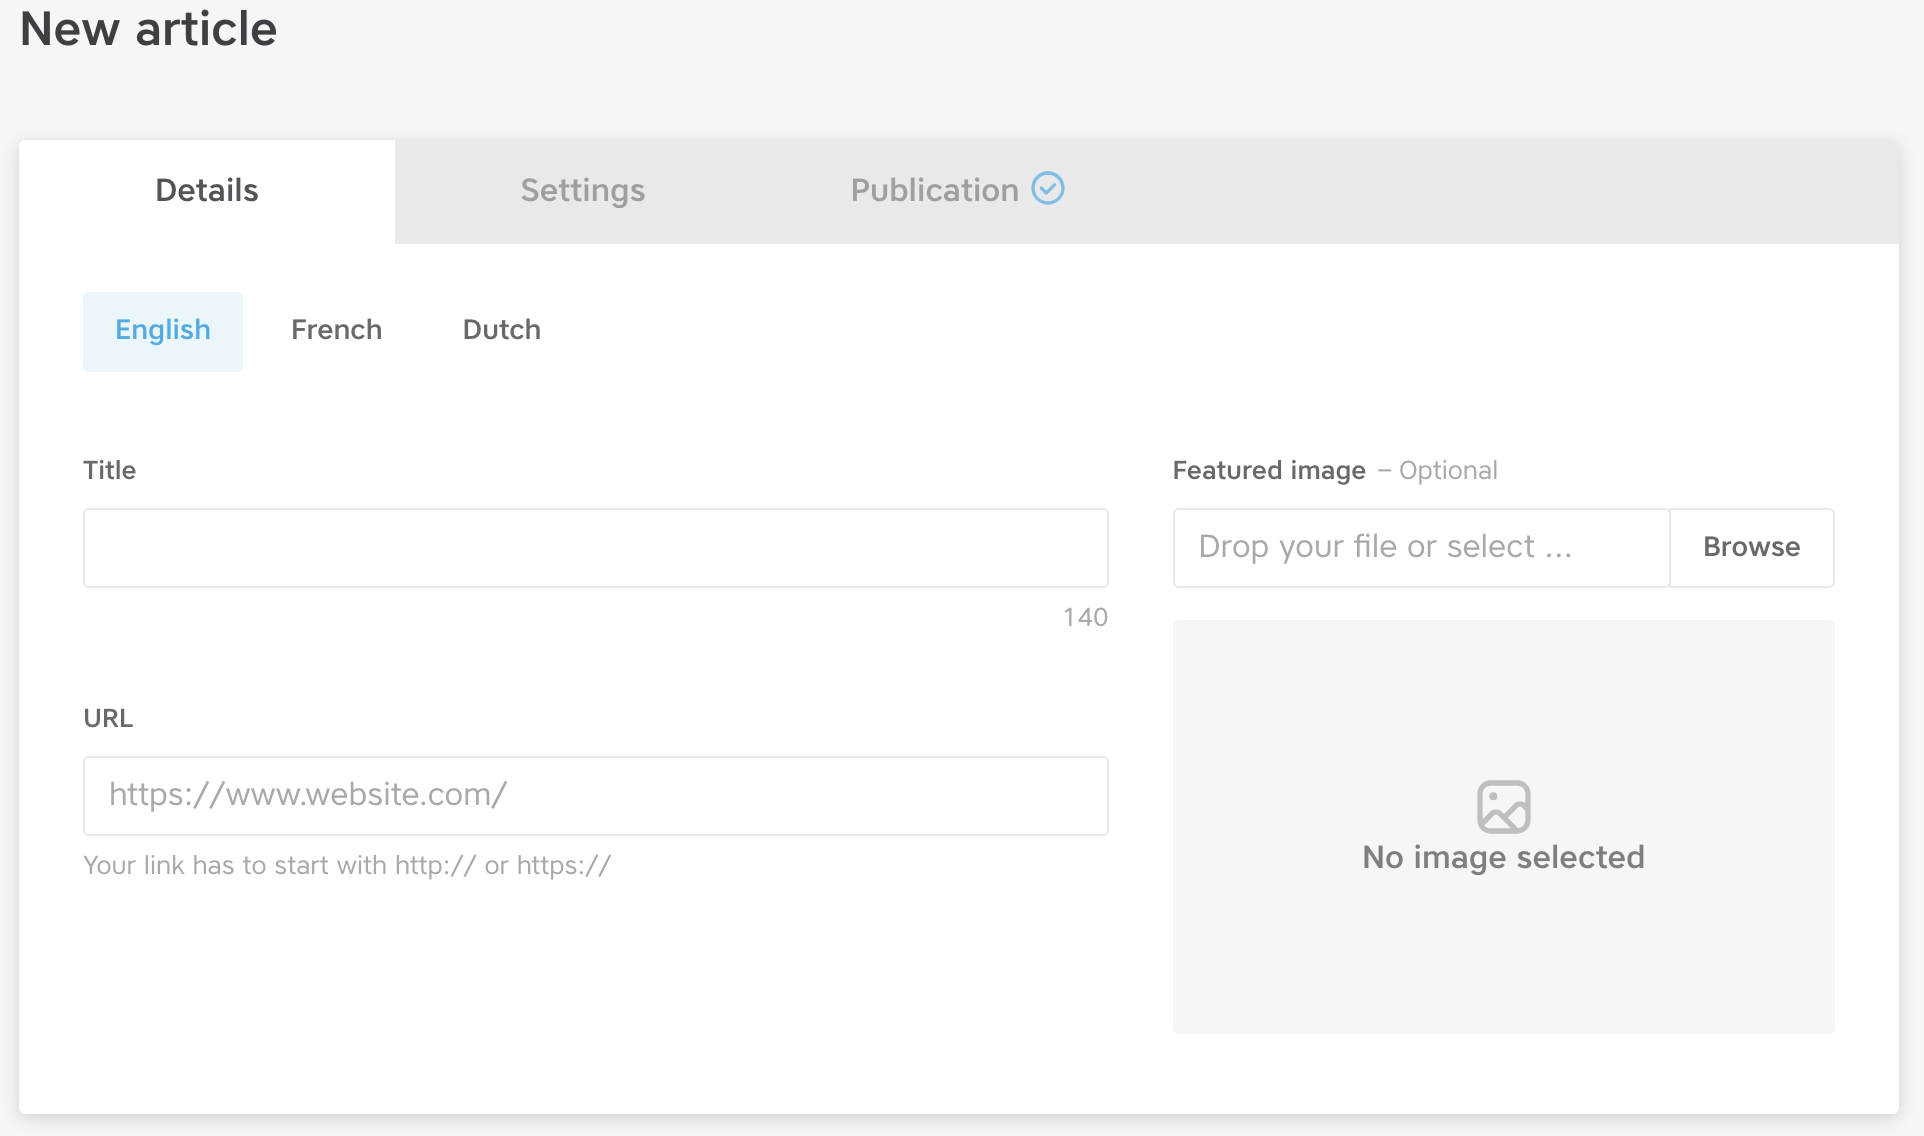
In this tab, you create the content for your post:
- Choose the correct language by clicking the corresponding button on top. If you want the article to be published in all available languages, you have to fill in all tabs correspondingly.
- You don’t need to fill in all languages. E.g. if the article you are sharing is in Dutch, you can just fill in the Dutch tab. But if there are people using the app in another language in your target audience, they will not see the article in their feed.
- Please note that there is no auto-translate available for this type of article.
- Fill in a title for the post.
- Fill in the URL to which you want to refer.
- Choose a header image for your post. You can choose to adapt the image per language, or to use the same one of the first language version that you created.
Settings tab
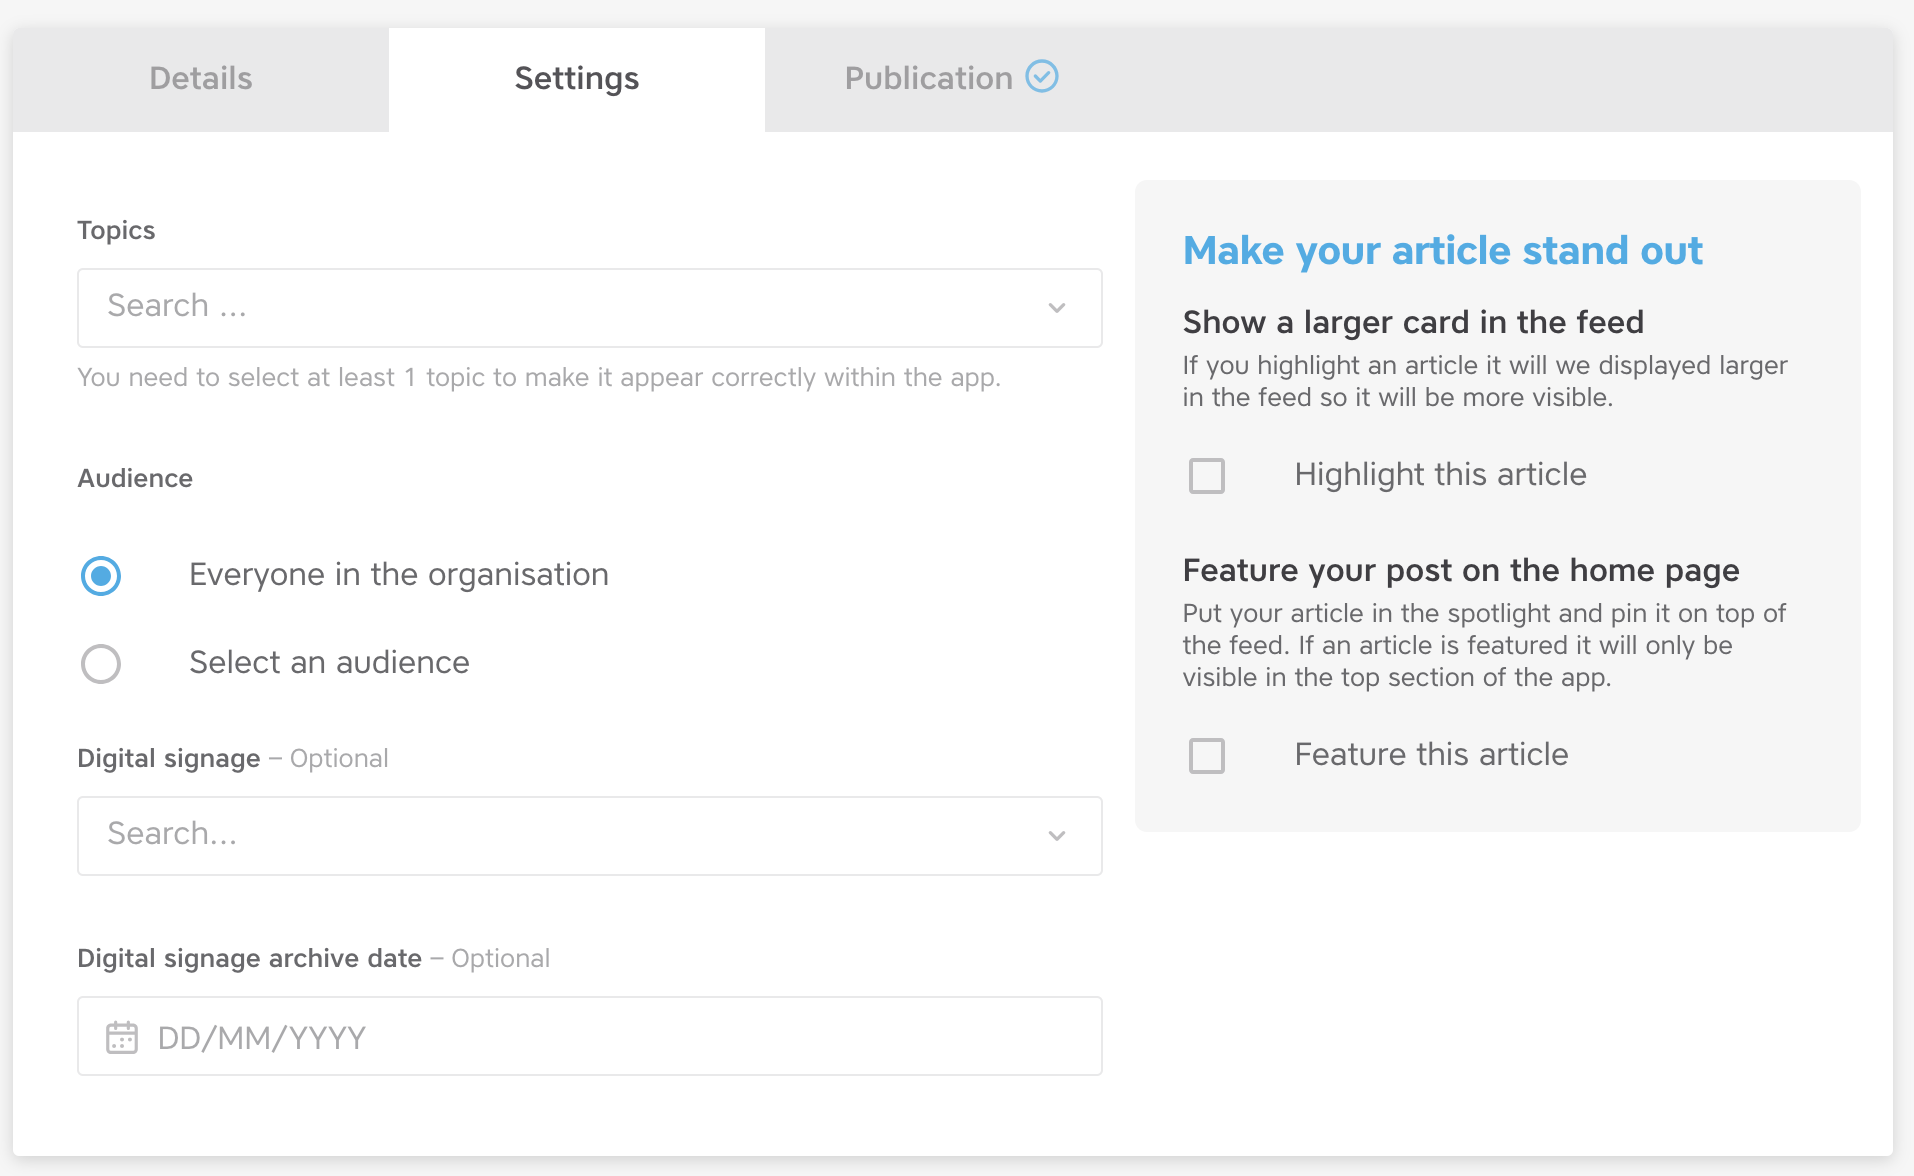
In this tab, you get to select a few settings for your article:
- The topic related to the article (mandatory): you have to select at least one topic.
- Audience (mandatory): select the target audience for your article, either « Everyone in the organization » or a specific audience.
- Digital signage (optional): if your Spencer app is linked to your digital signage system, you can select on what (group of) screen(s) you want the article to appear. And you can choose a separate archive date for the publication on the screens.
- Make your article stand out (optional): select one or both of these feature to create a more dynamic newsfeed. If you choose to feature the article, you can select an expiry date, after which the article will appear in the regular newsfeed. Check our best practice article to play these features to their strengths.
Publication tab
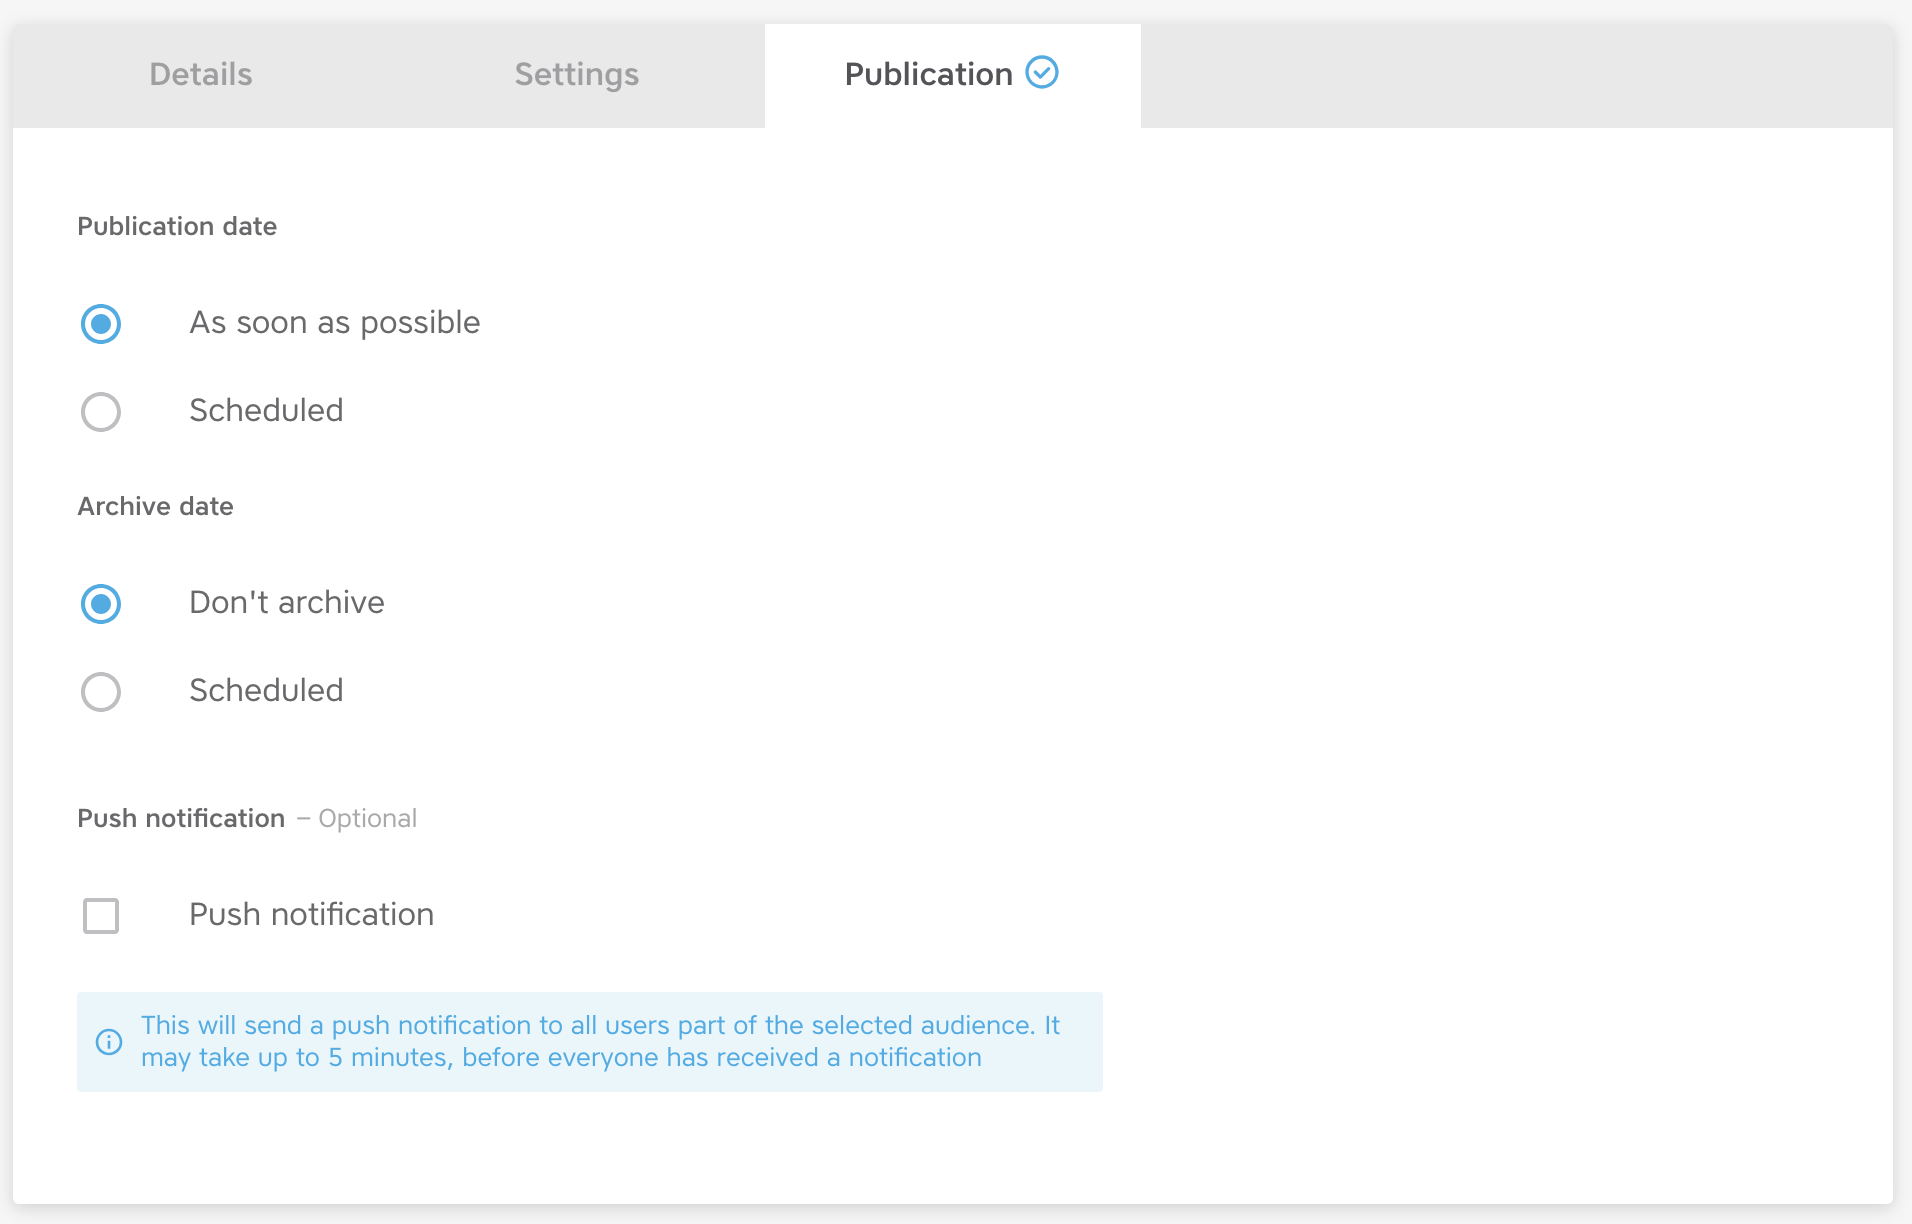
In this tab, you select a few options related to publishing your article:
- Publication date: either « As soon as possible » or on a moment in the future
- Archive date: if this article is no longer newsworthy after a certain date, you can select an archive date. The article will then no longer be visible in the app, but it remains accessible in the back office.
- Push notification: select whether or not you want to notify your users of the publication with a push notification.
Publishing your article
If you have completed all mandatory fields, you can publish your article. The Publish button in the bottom right corner becomes blue and clickable. If not, the Publish button remains grey and unclickable.
Not sure what mandatory field you have missed? Check the tabs on top. If all mandatory fields are completed, you will see a blue check mark appear. In the case below, there is still a mandatory field to complete on the Settings tab.

After publishing your article
After the publication of your article, you will see another tab « Report » appear when you open the article. There, 24 hours after the publication, you will find some insights about the reach and readership of the article.
Other options you have after publication:
- You can adapt the article and update it. Go to the related tab, change what you want to adapt and click the Update button in the bottom right corner. Please note that users will not be notified of this change by push notification unless you deliberately select this option again.
- Archive the article immediately by clicking the Archive button.
- Share the article via email or a text message with the share link that is generated when you click the Share button. Please note that the article will remain only visible for users of the app, not for any third parties without access to the app.
- Duplicate the article: need to publish a very similar article? Duplicate it and work on a copy of this article to avoid any duplicate work.
- Delete the article. This will remove the article from both the app and the back office.

3. Create a priority update
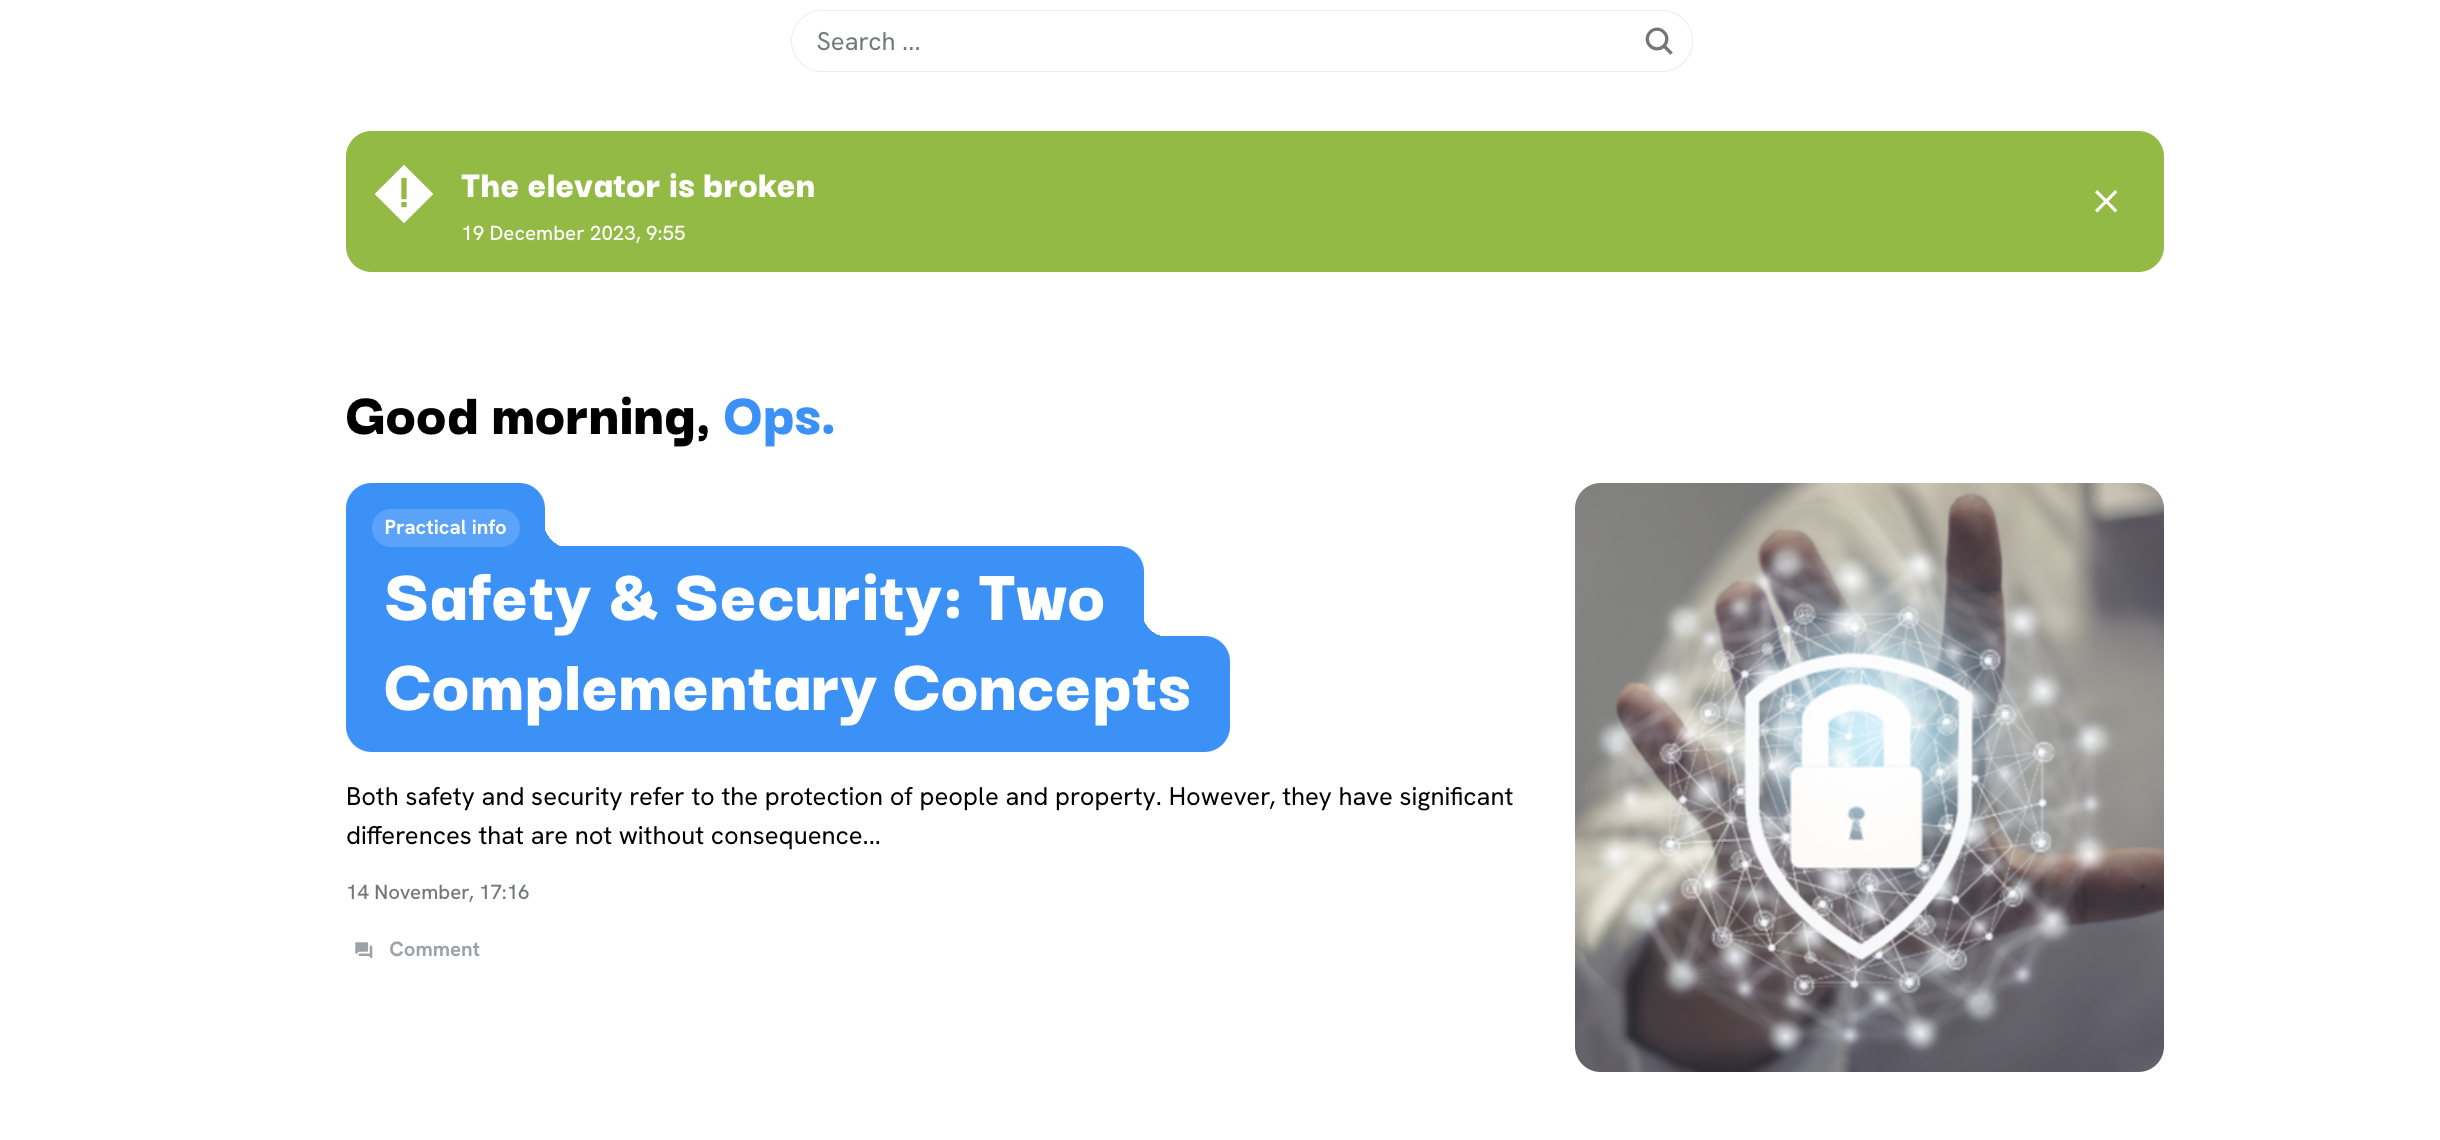
This type of article replaces the emergency news posts.
The priority update appears at the top of the homepage in a highlight color. Use this for emergency updates or updates that require short term focus (e.g. broken elevator).
When you create it, you have all features and options like when you create a regular article (see above in chapter 1: Create an article).
Any questions?
Our support team is here to make your life easier!