Spencer allows you to add a lot of information about users to their profile. This information can be used to create user lists and to segment your communication to the relevant target audience.
But sometimes you want to create a segment based on a criterium for which there is no field available in Spencer. For example: everyone that is a member of the extended leadership team.
Or you want a certain module (e.g. chat) to only be visible for a limited amount of people, and there is no common criterium that you can use as the base for creating a user list for these people.
In these cases, tags are the solution you’re looking for.
Tags overview
Go to User management > Tags.
There you see an overview of all current tags with this information:
- the name of the tag
- is the tag permanent: yes or no (scroll down for more information on permanent tags)
- the external ID of the tag

Create a new tag
Click on the Add new button on the top right corner.

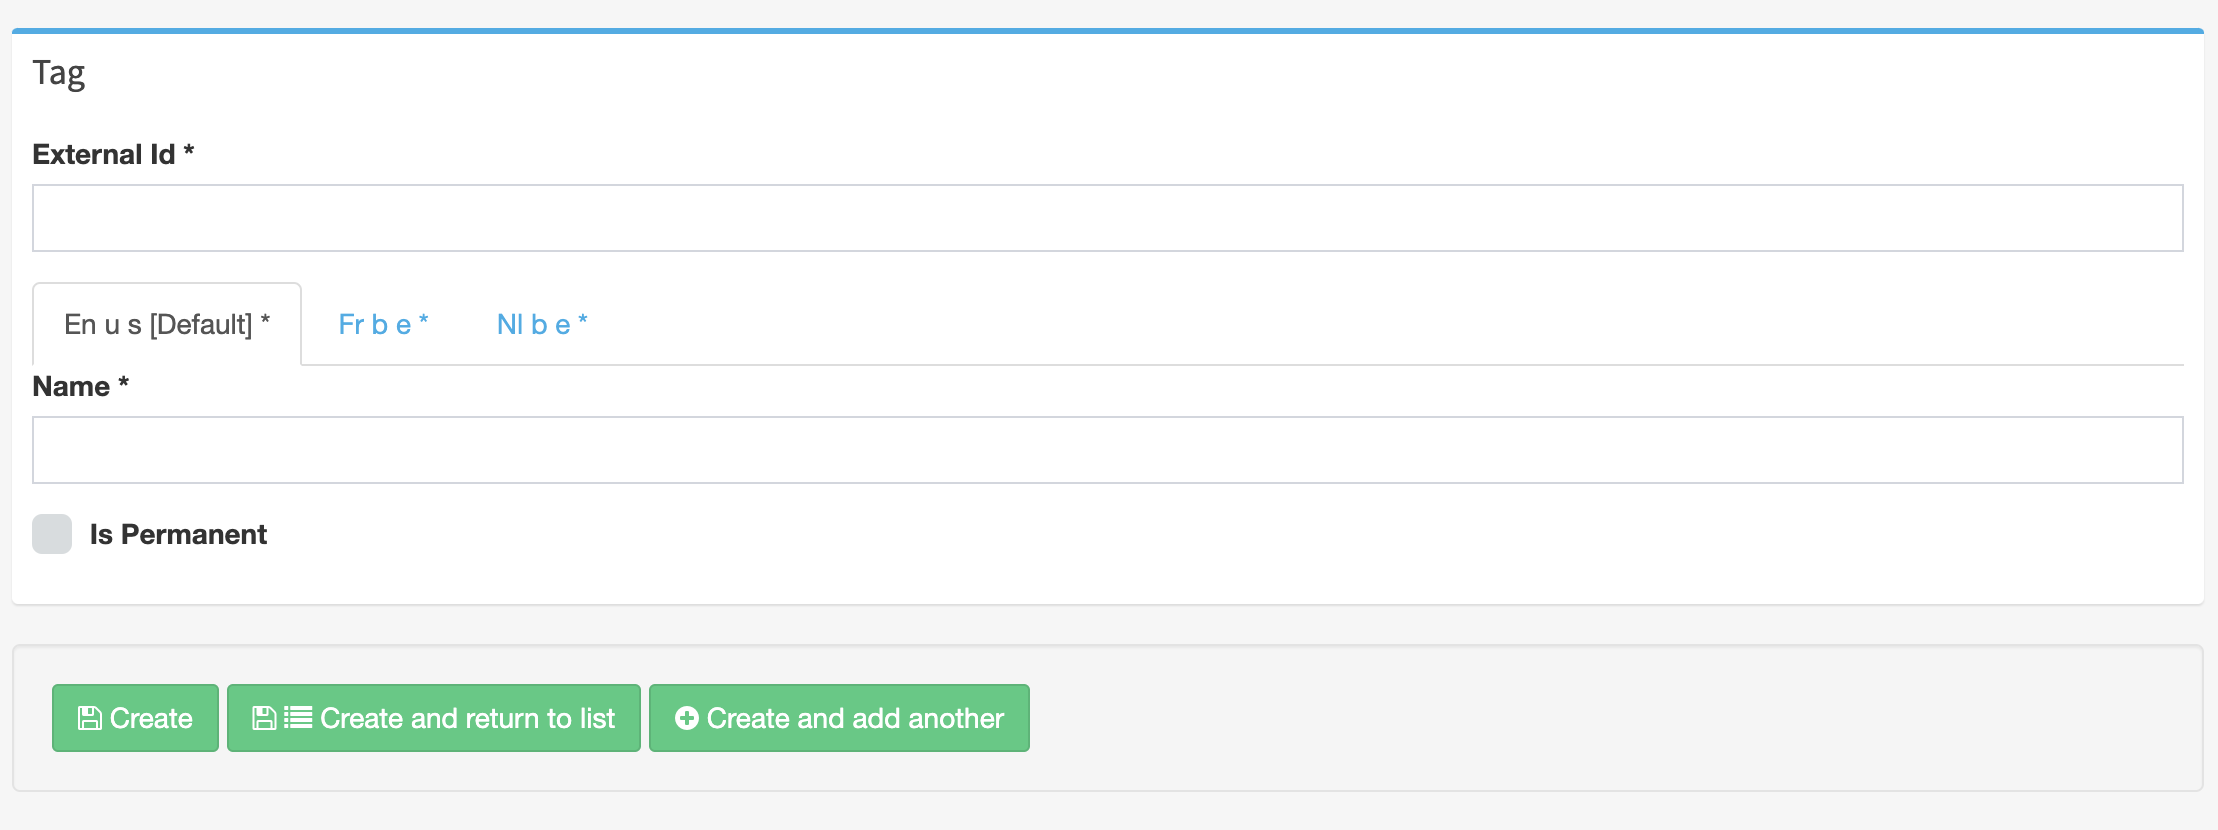
Complete these fields:
- External ID: this is what you add to the user’s profile, it can be the same as the name of the tag or an abbreviation (e.g. Extended Leadership Team can be the name and the external ID ELT).
- The name: complete this in English and all languages in which your app is available.
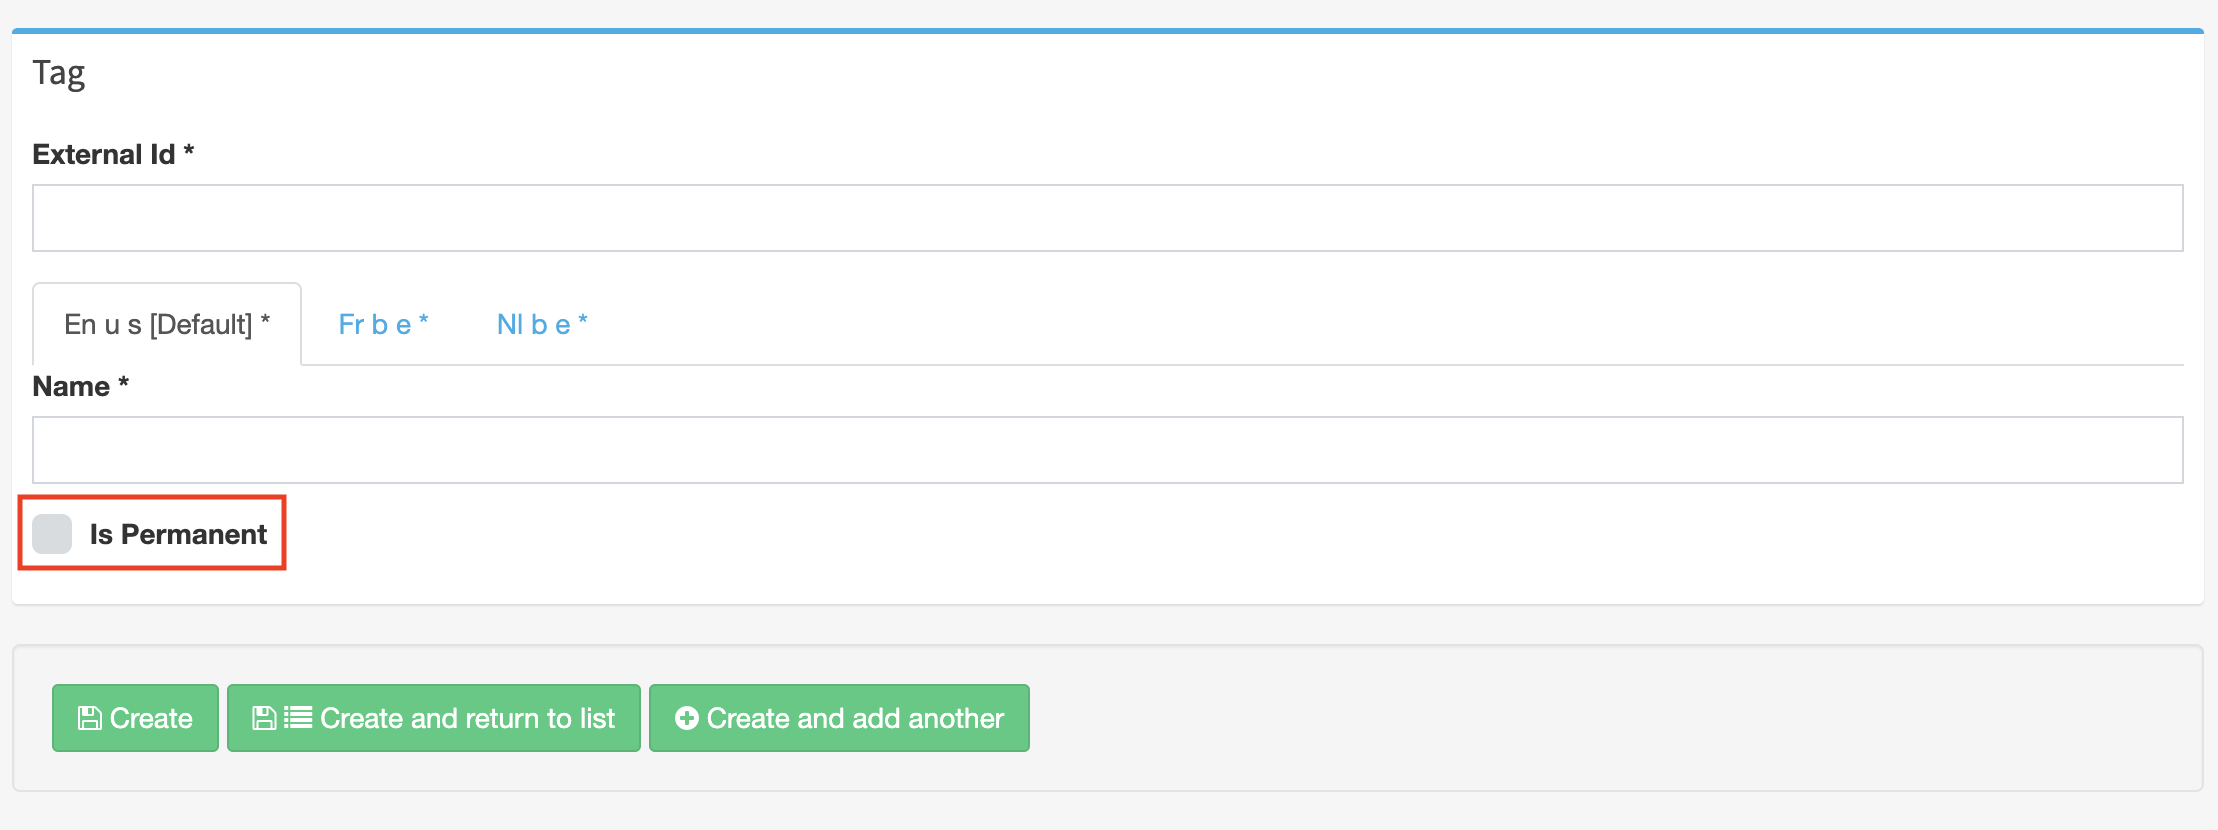
- Check the box before « Is permanent » to make the tag permanent (scroll down for more information on permanent tags).

Save the tag by clicking one of the 3 green buttons:
- “Create”
- “Create and return to list” to save the tag and return to the tags overview
- “Create and add another” to save the tag and be able to create another one
Flag permanent tags
- You can set a flag on a tag called “tag can not be removed from a user by user sync”. This tag is now “permanent” so it won’t be overwritten by user syncs.
- Check the box in front of « Is permanent » to do so.
- This enables easier creation of user lists based on tags in case the user sync do not support tags.
- For example: it allows to activate modules only for a limited amount of users.

How to add a tag to a user’s profile
This can be done automatically via the user sync. Or you can add it manually to a user’s profile.
Add a tag automatically via the user sync
- The designated column to add tags to someone’s profile is called « tags_en ». If your app has more languages, you have to add a column per other language, e.g. « tags_nl », « tags_fr », etc.
- There you fill in the external ID of the tag, followed by a : and the name of the tag in the corresponding language. E.g. mkt:marketing.
- If you want to add more than one tag, separate them with a comma.
- The order of the tags should be the same for every language column.
Add a tag manually via a user’s profile
- Go to User management > Users.
- Search for the user that you want to give a tag.
- Click on the user’s name to open the profile.
- Scroll down to the Tags section of the profile.

- Start typing the name of the tag you want to add. After adding 3 letters, you will get a dropdown menu with tags to choose from. Click on the tag you want to add.
- If you don’t know what tags you can add, click « List » to see the list.
- If you haven’t yet added the tag to the tags overview, click « Add Tag » to create it.
Save the changes by clicking « Update » or « Update and close ».

Any questions?
Our support team is here to make your life easier!